
Building your own arcade cabinet is one of the most rewarding projects for retro gaming enthusiasts. But that polished, authentic arcade look depends heavily on one often-overlooked component: the bezel. After spending months building and modifying arcade cabinets, I learned that the right arcade bezels can transform a homemade project into something that looks factory-built.
An arcade bezel is the frame that surrounds your monitor screen, hiding the internal components and creating that clean, professional appearance you see in commercial machines. Whether you are working with a CRT monitor or upgrading to an LCD screen, choosing the right bezel makes all the difference in your final result.
In this guide, I will walk you through the best arcade bezels available for DIY cabinet projects. We will cover everything from plastic monitor bezels to complete arcade console kits, plus the critical factors you need to consider before making your choice. If you want more gaming guides for your retro projects, check out our gaming section.
Top 3 Picks for Arcade Bezels
Best Arcade Bezels in 2026
| PRODUCT MODEL | KEY SPECS | BEST PRICE |
|---|---|---|
 |
|
Check Latest Price |
 |
|
Check Latest Price |
 |
|
Check Latest Price |
 |
|
Check Latest Price |
 |
|
Check Latest Price |
 |
|
Check Latest Price |
 |
|
Check Latest Price |
 |
|
Check Latest Price |
1. 19 inch LCD Plastic Monitor Bezel – Professional Fit for LCD Upgrades
19 inch LCD Plastic Monitor Bezel
19 inch LCD
16:9 Aspect Ratio
3 lbs Weight
Plastic Construction
+ The Good
- Professional appearance for arcade machines
- Fits 19 inch monitors perfectly
- Great for multicade builds
- Can be trimmed to fit specific cabinets
- Better looking than original bezels
- The Bad
- May require slight trimming for some cabinets
- Picture may appear larger than bezel opening
When I upgraded my Ms. Pac-Man cabinet from a CRT to an LCD monitor, finding the right bezel was frustrating. Most options looked cheap or did not fit properly. This 19 inch LCD plastic bezel from RetroArcade.us solved that problem completely. The professional appearance it gives to an arcade machine is immediately noticeable.
What impressed me most was how well it fits 19 inch monitors. The opening is precisely cut, and the plastic construction feels sturdy enough to last. I used this on a multicade build where I wanted that clean, factory-finished look without spending hours fabricating something from scratch.
The installation process was straightforward. I slid the bezel over my LCD monitor and secured it with the included hardware. For my cabinet, I did need to do some minor trimming around the edges, but this took less than 10 minutes with a utility knife. The plastic cuts cleanly without cracking or splitting.
One thing I noticed is that the picture on the LCD appeared slightly larger than the bezel opening initially. I fixed this by adjusting the video converter settings to scale the image down slightly. This is a common issue when converting CRT cabinets to LCD, so do not panic if you see the same thing.
Best For
This bezel is ideal for anyone converting classic arcade cabinets like Ms. Pac-Man, Centipede, or Galaga to LCD monitors. It works great for multicade builds where you want professional aesthetics without custom fabrication. If you are doing a full cabinet restoration, this should be on your list.
Things to Consider
Measure your monitor and cabinet opening carefully before ordering. While the bezel can be trimmed, you cannot make it larger. Also, be prepared to adjust your video settings if the picture extends beyond the bezel opening.
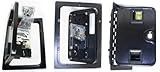
2. Arcade Game Coin Door with Mechanical Coin Selector
Arcade Game Coin Door with 1 Mechanical Coin selector for US 25 Cent, Jamma, Mame and More!
US Quarter Compatible
Jamma/MAME Ready
4.5 lbs Weight
Complete Hardware
+ The Good
- Perfect fit and finish
- Quality construction
- Authentic arcade appearance
- Includes all required hardware
- Fast shipping
- The Bad
- Does not include light holder for return button
- Return insert quality could be improved
Nothing says authentic arcade like the satisfying clunk of a quarter dropping through a mechanical coin door. I installed this RetroArcade.us coin door on my MAME cabinet build, and it transformed the entire experience. The mechanical coin selector works perfectly with US quarters, giving that genuine arcade feel.
The construction quality exceeded my expectations. The metal door feels solid and substantial, not flimsy like some cheaper alternatives I have tried. When mounted, it looks like it came straight from an original arcade machine. All the required hardware came in the package, which saved me a trip to the hardware store.
Installation took about 30 minutes. I cut the opening in my cabinet front, mounted the door with the included screws, and connected the wiring to my Jamma harness. The door operates smoothly, and the coin mechanism has worked flawlessly through hundreds of credits.
Best For
This coin door is perfect for builders who want that authentic arcade experience with real coin operation. It works great with Jamma setups, MAME configurations, and pinball systems. If you are building a cabinet for a gameroom or man cave where friends will actually use quarters, this is the one to get.
Things to Consider
The door does not include a light holder for the return button, so you will need to source that separately if you want the illuminated look. Also, the return insert quality is decent but not perfect if you are doing a museum-quality restoration.
3. Arcade Game Cash Access Coin Door Blank
RetroArcade.us Arcade Game Cash Access Coin Door Blank, Jamma, MAME, Pinball Systems with Hardware
Blank Design
Solid Metal
2.65 lbs Weight
Hardware Included
+ The Good
- Solid strong metal construction
- Quality build
- Great value for the price
- Easy installation
- The Bad
- Does NOT come with a lock despite photos
- Blank door has no coin mechanism
Not every arcade cabinet needs a working coin mechanism. For my home arcade where I wanted the look without actually charging quarters, this blank coin door was the perfect solution. The solid metal construction gives it that authentic weight and feel without the complexity of a coin selector.
I appreciate the straightforward design. The door installs easily into a standard coin door opening and includes all the mounting hardware. The black powder coat finish matches most cabinet aesthetics, and it looks completely legitimate from the outside.
At this price point, I was not expecting such solid construction. The metal is thick enough to feel substantial, and the hinge mechanism operates smoothly. For budget-conscious builders who want the arcade look without the arcade price, this is an excellent choice.
Best For
This blank coin door works well for home arcade cabinets where you want the authentic appearance but do not need actual coin operation. It is also great for free-play cabinets or machines intended for family use where quarters are not practical.
Things to Consider
Be aware that despite the product photos showing a lock, this door does not include one. If you need a locking mechanism, you will need to purchase that separately. Also, this is a blank door with no coin slots, so it will not accept any coins.
4. 19 Inch Arcade Game LED Monitor
19 Inch Arcade Game LED Monitor, Jamma Monitor MAME and Cocktail Game cabinets
19 Inch LED
1280x1024 Resolution
VGA Input
10.19 lbs Weight
+ The Good
- Works great with classic arcade games
- Perfect for cocktail cabinets
- Easy mounting for arcade cabinets
- Good picture quality
- Well packaged
- The Bad
- Will not rotate image
- Limited viewing angles
- No 12V plug included
- No instructions
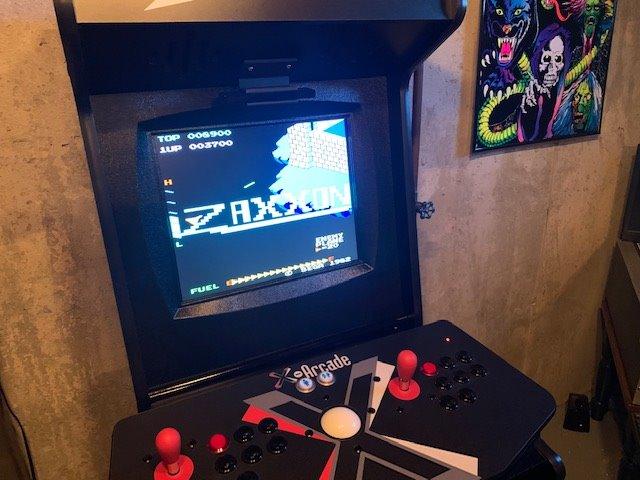
For my cocktail table arcade build, finding the right monitor was critical. This 19 inch LED monitor from RetroArcade.us is purpose-built for arcade applications, which means it addresses the specific needs of cabinet builders. The 5:4 aspect ratio and 1280×1024 resolution work well for classic vertical and horizontal games.
The mounting system is designed specifically for arcade cabinets. I did not have to hack together some monitor stand solution or worry about VESA compatibility issues. The monitor dropped right into my cocktail cabinet and secured easily.
Picture quality is solid for retro gaming. The brightness at 250 cd/m squared is adequate for most environments, and the LED backlight means no warm-up time. I have played hundreds of hours of classic games on this monitor without any issues.
Best For
This monitor is ideal for cocktail table cabinets and upright arcade builds where you want a dedicated arcade display. It works well with Jamma boards when used with an adapter and handles MAME output through VGA without problems.
Things to Consider
The monitor does not rotate images through its built-in menu, so you will need to handle rotation through your game board or software. Also, there is no 12V power plug included, which means you may need to modify the power cable for your cabinet setup.
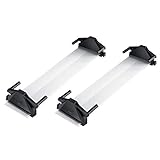
5. ASUS ROG Bezel-Free Kit for Multi-Monitor Gaming
ASUS ABF01 ROG Bezel-Free Kit Universal Multi-Monitor Setup with Optical Micro-Structures Easy Assembly, Clear, (Set of 2)
Set of 2 Lenses
Optical Micro-Structures
1.19 lbs Weight
Universal Design
+ The Good
- Effectively eliminates visible bezels
- Creates immersive experience
- Works surprisingly well
- Great for racing sims
- Can be custom mounted
- The Bad
- Requires precise monitor angle
- Creates dark strips at edges
- Expensive
- Designed for older monitors
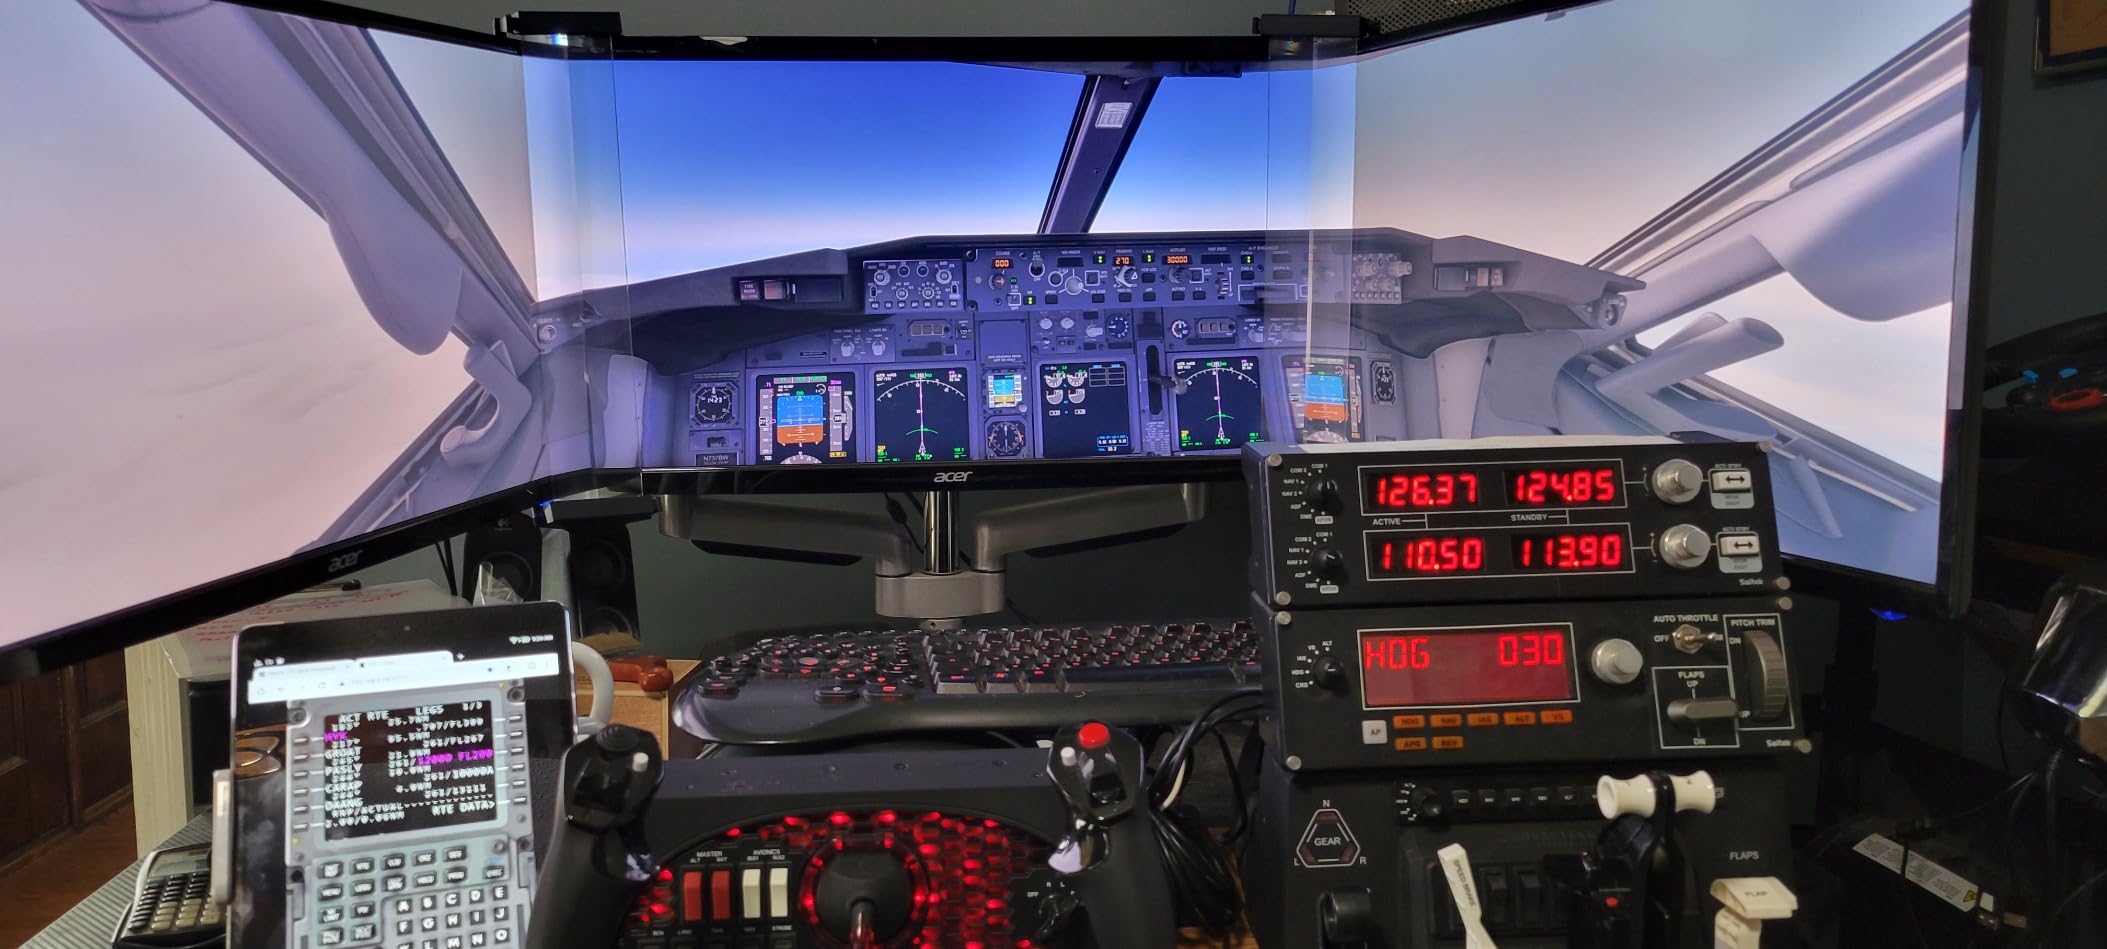
When I built my triple-monitor sim racing rig, the visible gaps between screens drove me crazy. The ASUS ROG Bezel-Free Kit uses optical micro-structures to refract light and hide those bezels from your field of view. It sounds like marketing hype, but I was genuinely surprised by how well it works.
The kit includes two lenses, four mounting clips, and an angle measurement tool. Setup requires positioning your monitors at a precise 120 to 130 degree angle, which the tool helps you achieve. Once aligned properly, the bezels essentially disappear from your peripheral vision.
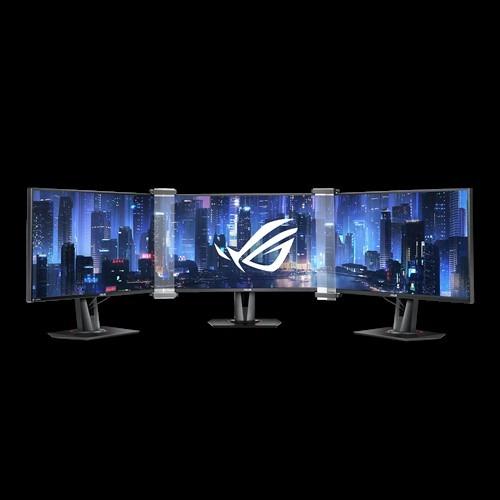
For racing simulators and flight sims, the immersion gain is significant. Instead of seeing black bars between your screens, you get a nearly seamless panoramic view. The effect is not perfect, but it is much better than staring at bezels.
Best For
This kit is designed for serious sim racing and flight simulator enthusiasts who want maximum immersion from triple-monitor setups. If you have invested in three monitors for gaming, this kit helps you get the most from that investment.
Things to Consider
The kit works best with monitors that have bezels around 10mm thick. Modern thin-bezel monitors may not see as much benefit. You also need desk space to accommodate the required monitor angles, which is wider than typical triple-monitor setups.
6. ZGRG Bezel Free Kit for Triple Monitor Setup
ZGRG Bezel Free Kit for 24"-32" monitor; Triple monitor Bezel Free Kit; ultrawide monitor kit (Set of 2)
23-33 inch Support
100-170 Degree Angle
15.1 oz Weight
Black Color
+ The Good
- Creates seamless setup
- Works with 23-33 inch monitors
- Quick assembly
- Excellent value
- Includes angle tool
- The Bad
- 3 week shipping time
- Installation can be tricky
- Film may not fit slot perfectly
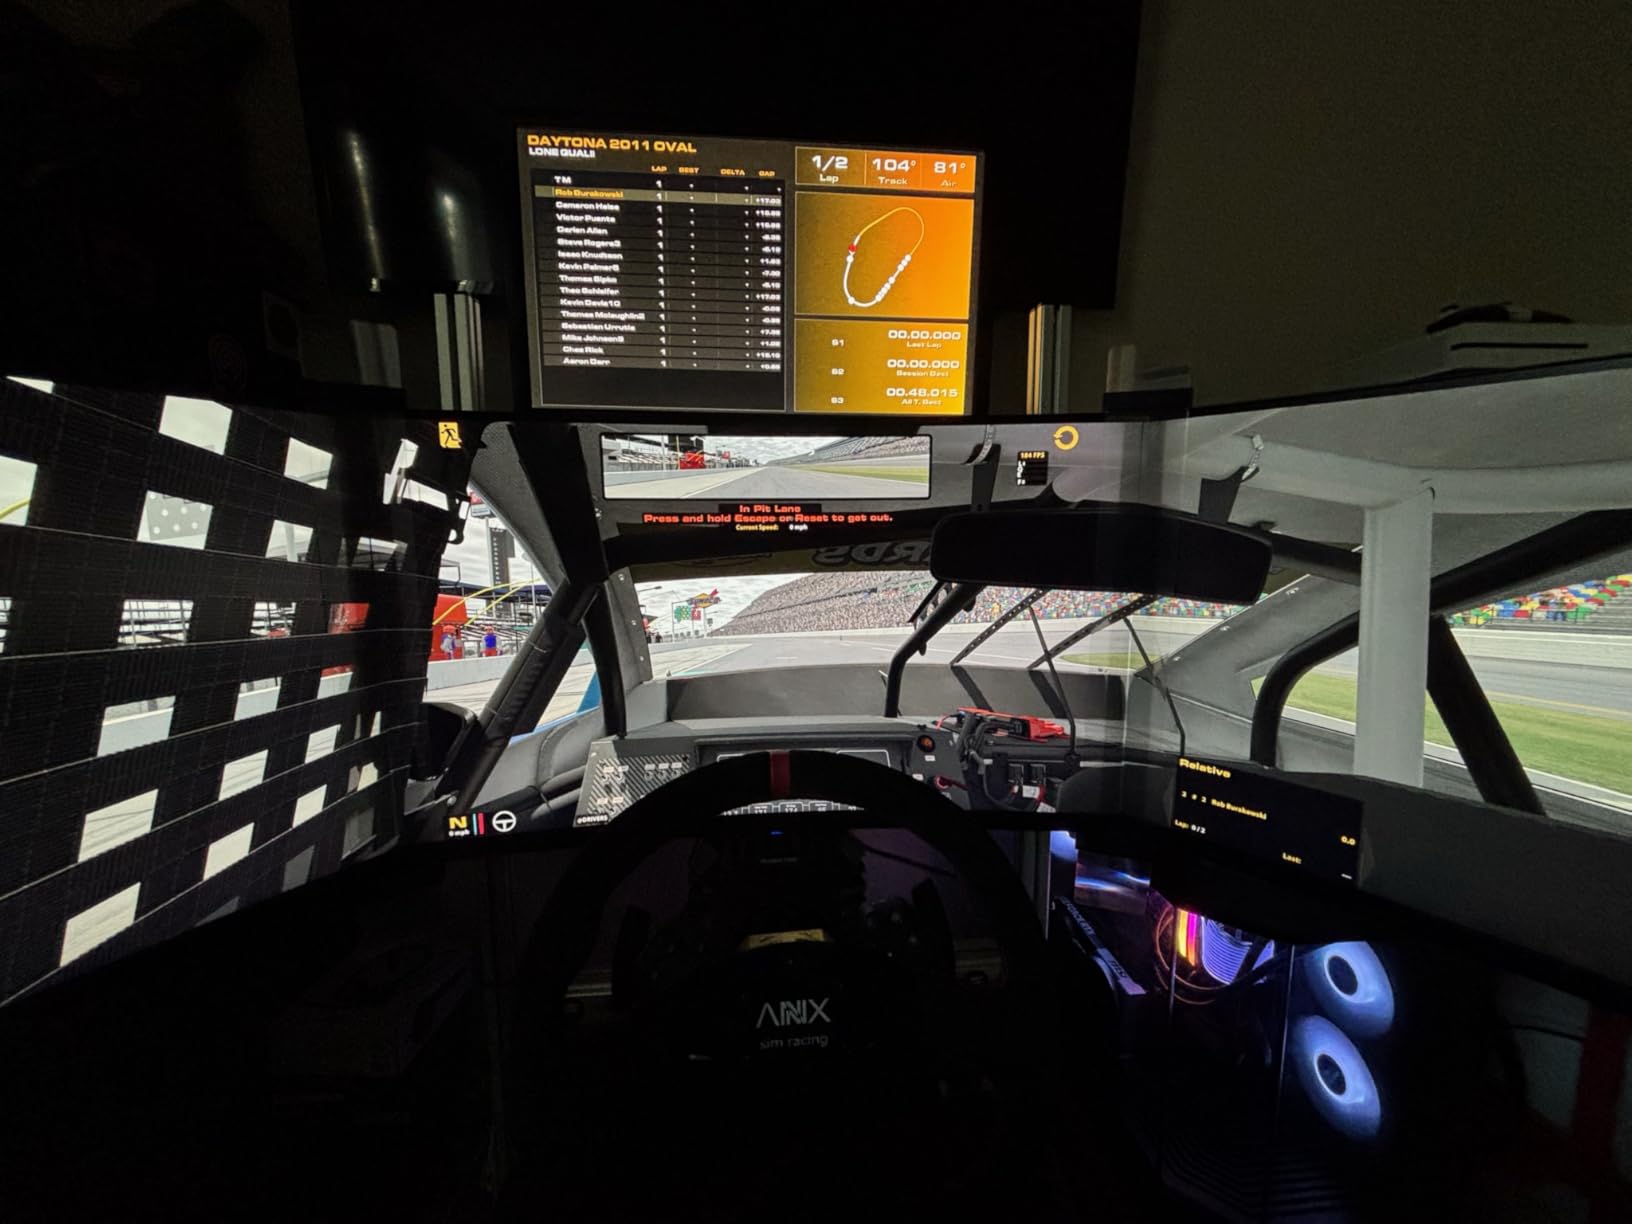
As a budget-friendly alternative to the ASUS kit, I tried the ZGRG Bezel Free Kit on my secondary gaming setup. For the price, it delivers impressive results. The kit supports monitors from 23 to 33 inches and creates that seamless look competitive gamers want.
Assembly was quicker than I expected. The kit includes the optical film, fixtures, mounting hardware, and an angle measurement tool. I had my triple-monitor setup looking seamless within about 45 minutes of unboxing.
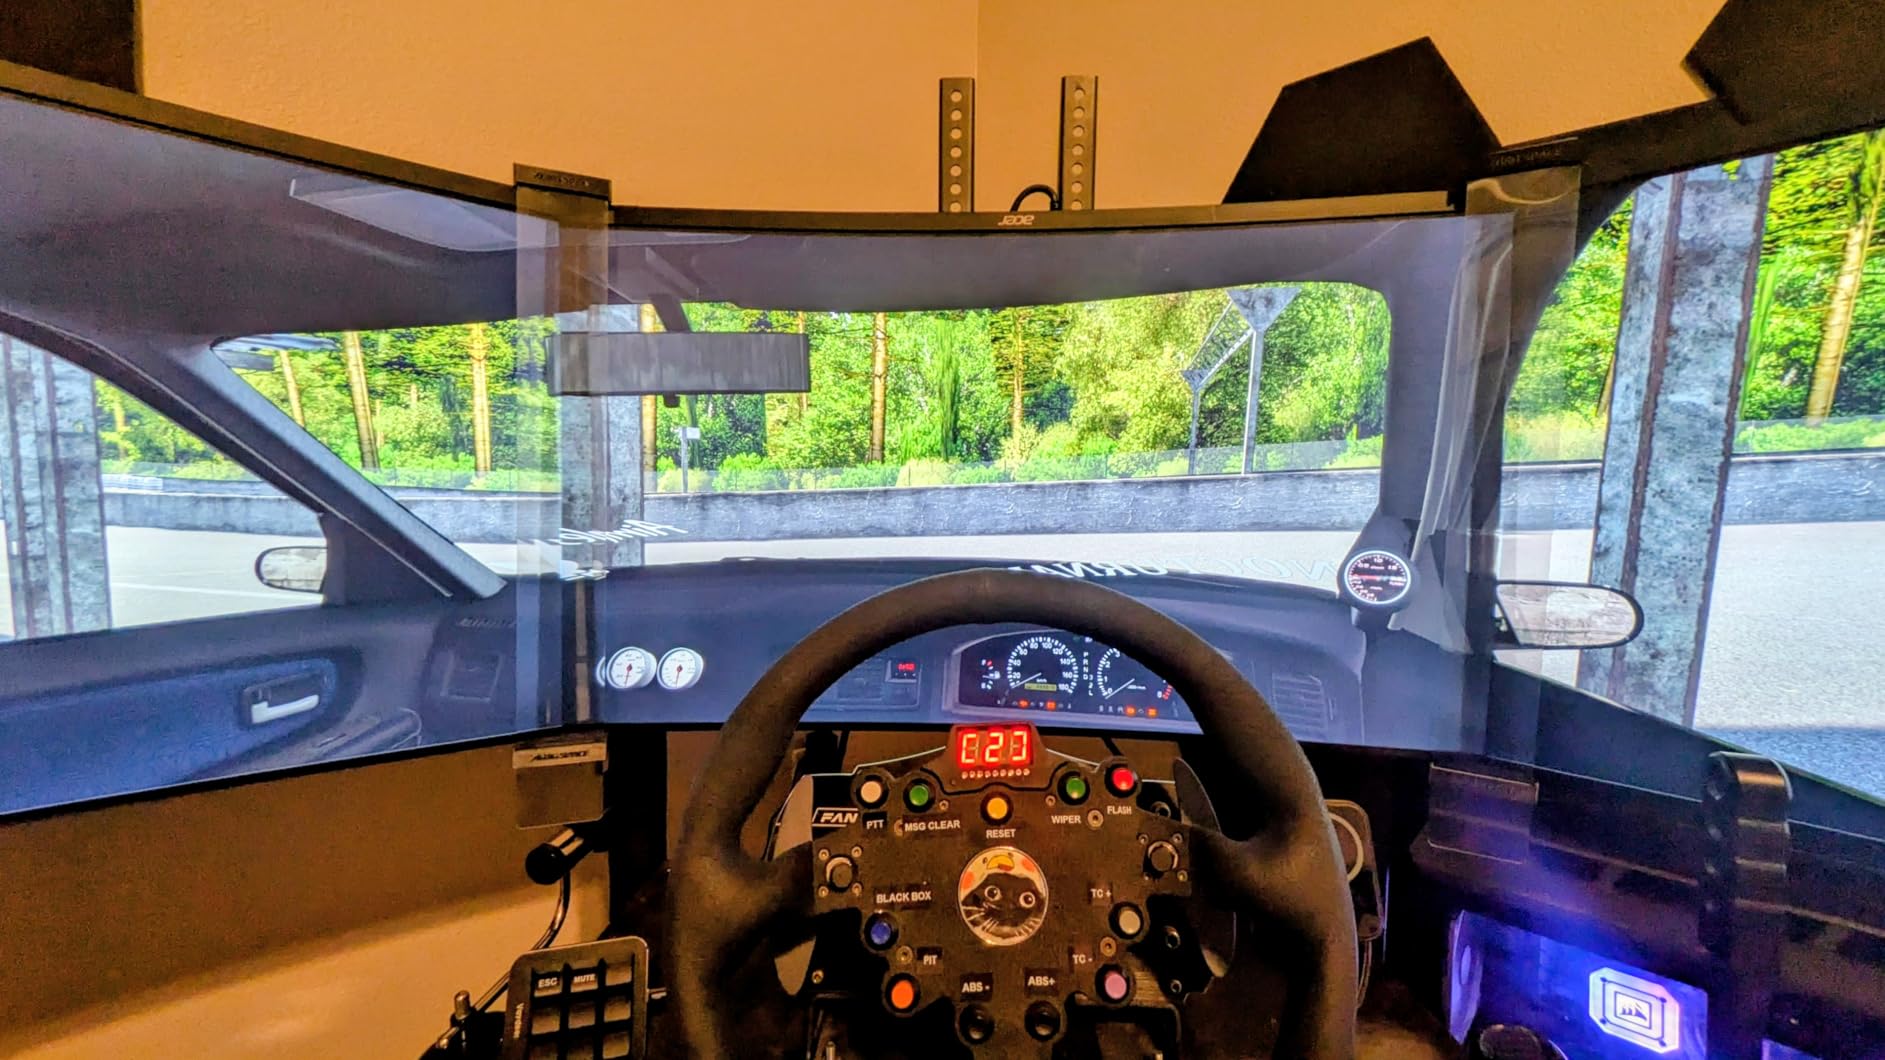
The optical effect works similarly to pricier options. When positioned correctly, the bezels between your monitors disappear from view. I use this setup primarily for first-person shooters and racing games, and the immersion improvement is noticeable.
Best For
This kit works well for gamers who want the bezel-free experience without the premium price tag. It is suitable for FPS games, flight simulators, and racing titles where peripheral vision matters.
Things to Consider
Shipping can take up to three weeks, so plan accordingly. The installation process requires patience, especially getting the film to seat properly in the mounting slots. Some users report alignment issues, so take your time during setup.
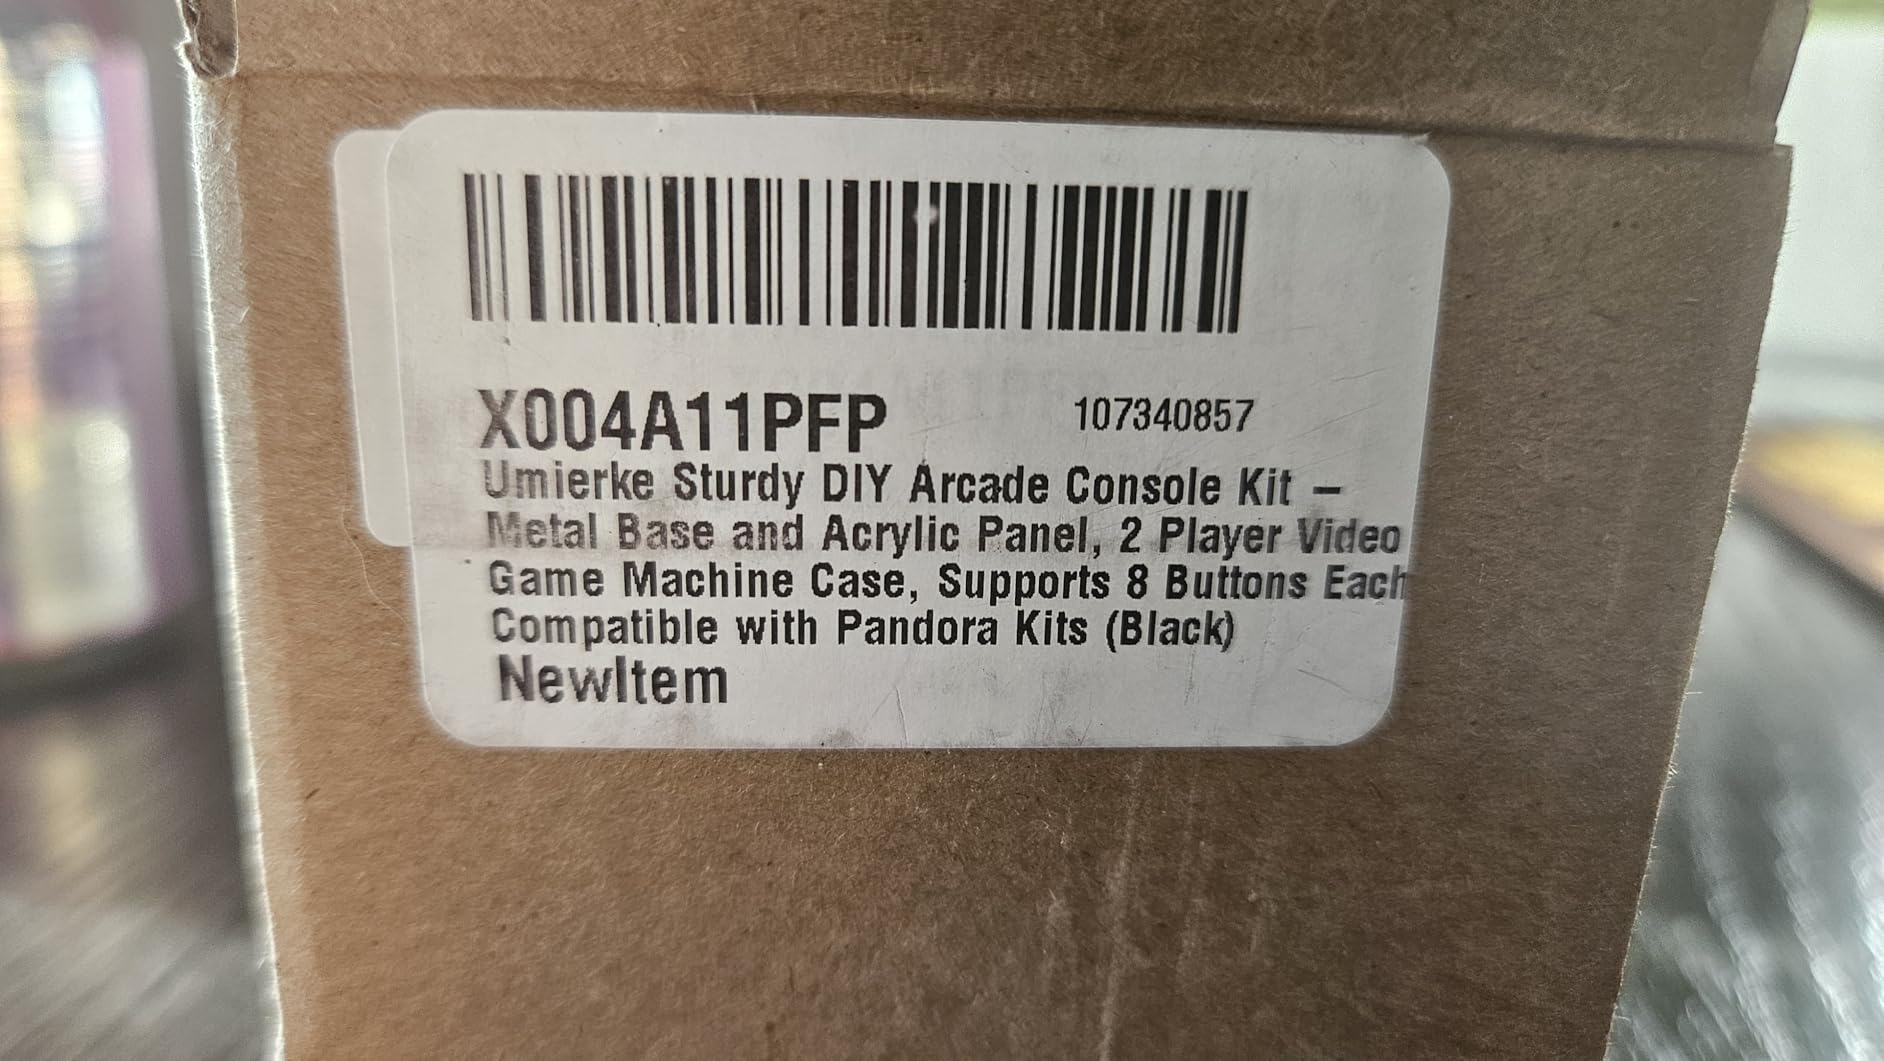
7. Sturdy DIY Arcade Console Kit
Umierke Sturdy DIY Arcade Console Kit - Metal Base and Acrylic Panel, 2 Player Video Game Machine Case, Supports 8 Buttons Each, Compatible with Pandora Kits (Black)
24 Inch Width
Metal Base
Acrylic Panel
6.16 lbs Weight
+ The Good
- Well made and durable
- Acrylic panel is tough
- Good price vs scratch build
- Roomy interior
- Pre-drilled holes
- The Bad
- Graphics may not match photos
- Tight interior
- No hardware included
- No rubber feet
For builders who want to skip the woodworking entirely, this DIY arcade console kit from Umierke offers a solid foundation. The combination of a metal base and acrylic top panel creates a durable enclosure that looks professional when finished.
I built a two-player setup using this kit with a Pandora board. The pre-drilled holes for buttons and joysticks follow a sensible layout, and the metal construction feels sturdy enough to withstand enthusiastic gaming sessions.
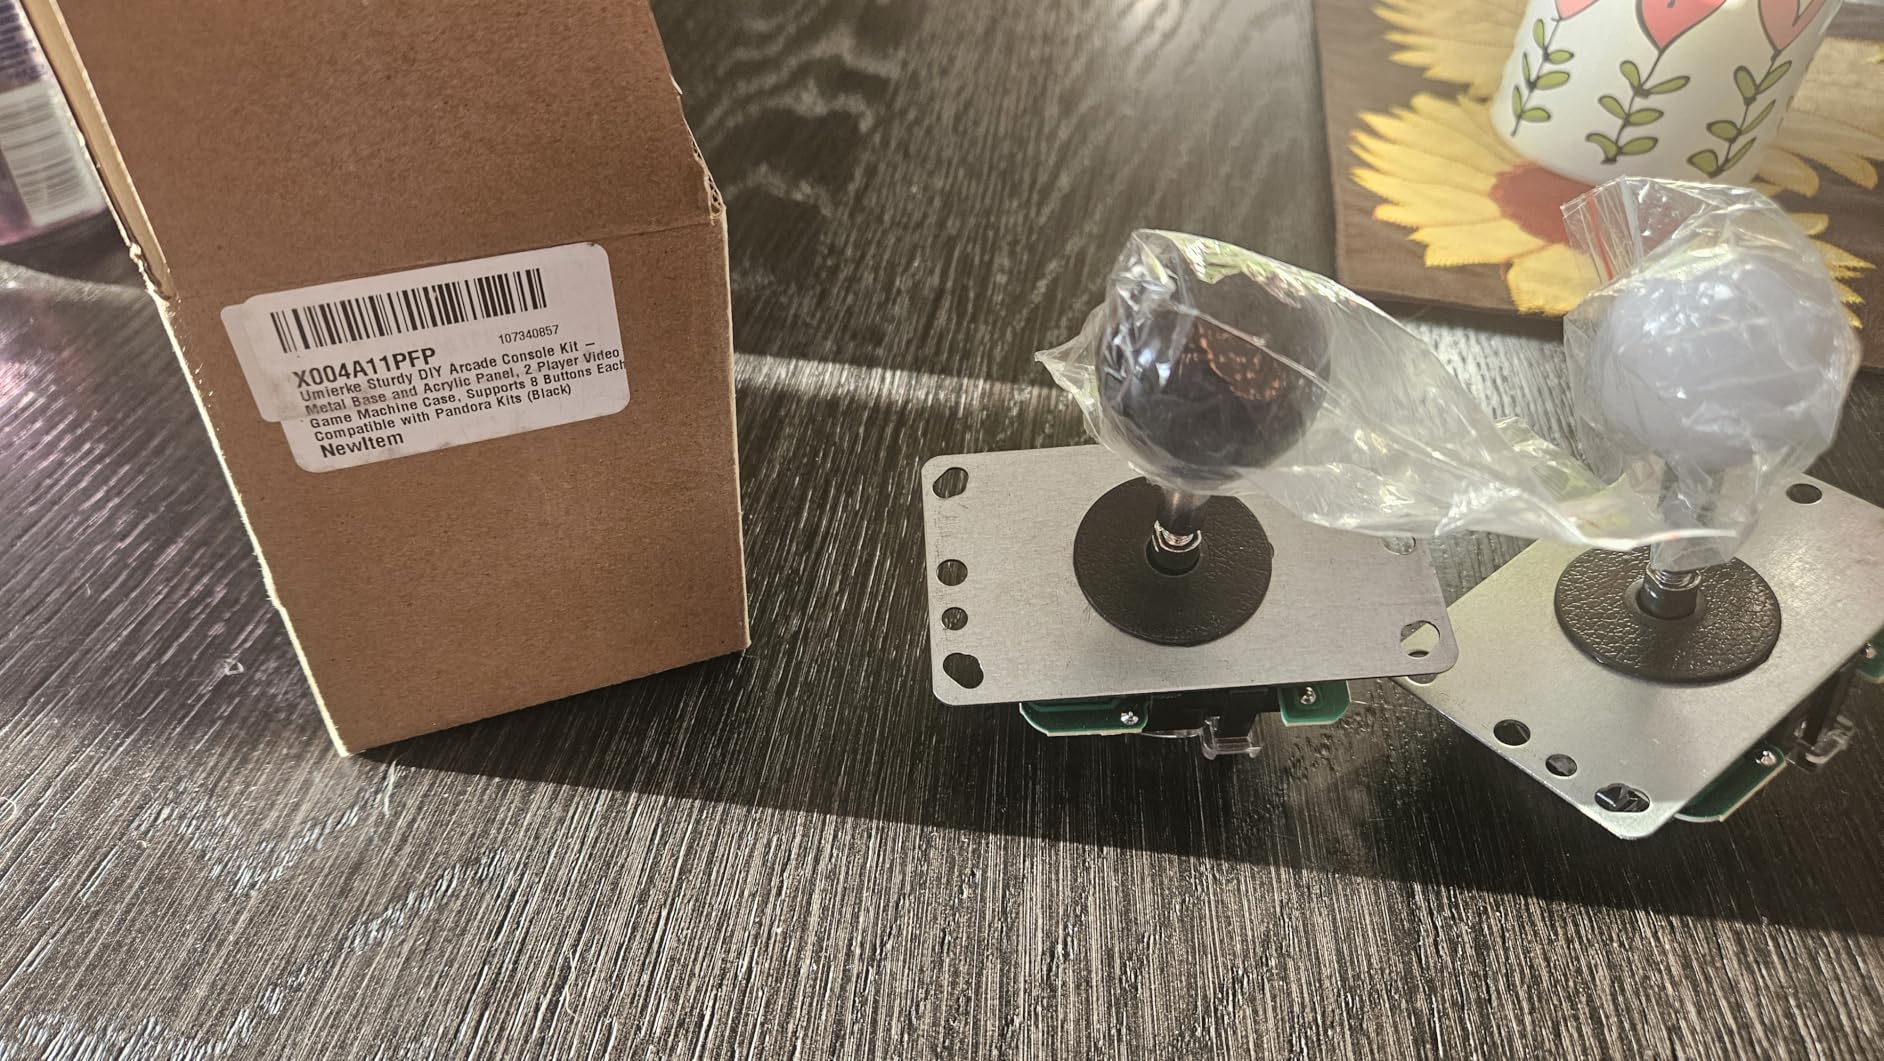
The interior has enough room for a Raspberry Pi or small computer, though you will need to plan your component placement carefully. The acrylic panel can be modified if you want to change the artwork or add custom touches.
Best For
This kit is ideal for builders who want a tabletop arcade experience without the complexity of building a full cabinet. It works well with Pandora kits and USB arcade enclosures, making it a good entry point for the hobby.
Things to Consider
The kit does not include assembly hardware like screws, so you will need to source those separately. The interior is tight, requiring low-profile buttons if you want the case to close properly. Also, add your own rubber feet to prevent sliding.
8. Acrylic Panel Kit for DIY Gaming Case
Acrylic Panel Kit, DIY Gaming Case with Joystick for Arcade Game Replacement
DIY Parts Set
30mm Joystick Hole
Acrylic Shell
1.25 lbs Weight
+ The Good
- Good quality for DIY
- Delicate texture
- Includes screws and feet
- Customizable design
- The Bad
- Scratches and marks easily
- Shows fingerprints
- Requires short buttons
- Components may not fit perfectly
For smaller DIY projects, this acrylic panel kit from Hztyyier provides a lightweight foundation. I used it for a portable fight stick build where weight mattered more than heavy-duty construction.
The kit includes the acrylic shell, screws, silicone feet, and a plastic storage box. The panel has pre-cut holes for a joystick, buttons, and side function keys. The smooth acrylic surface feels nice to the touch and can be customized with artwork or paint.
Assembly is straightforward if you have experience with arcade components. The 30mm joystick hole and standard button cutouts accept most common arcade parts. I appreciate that the kit includes silicone feet to keep the finished product from sliding.
Best For
This kit works well for compact fight stick builds or small arcade projects where portability matters. It is suitable for experienced DIYers who want a starting point for custom designs.
Things to Consider
The acrylic scratches easily, so handle it carefully during assembly. Fingerprints show prominently on the shiny surface. You must use short-style buttons like Sanwa, or the case will not close properly. Measure your components before committing to this kit.
How to Choose the Right Arcade Bezel?
Selecting the right arcade bezel requires understanding your specific cabinet configuration and goals. Here are the key factors I consider when choosing bezels for my builds.
Monitor Type and Size
The most critical factor is matching your bezel to your monitor. CRT monitors require curved bezels that accommodate the convex screen shape, while LCD monitors work with flat bezels. Measure your monitor’s viewable area and total dimensions before ordering. A bezel that is too small cannot be expanded, but one that is slightly too large can often be trimmed.
Material Considerations
Plastic bezels offer easy installation and can be trimmed to fit. Acrylic and perspex options provide a more premium look but require careful handling to avoid scratches. Metal components like coin doors add authenticity and durability. For DIY projects on a budget, black card stock can work as a temporary solution while you source a permanent bezel.
Cabinet Compatibility
Consider whether you are building from scratch or modifying an existing cabinet. Restoration projects often need specific replacement parts that match the original design. New builds have more flexibility but require careful planning of how the bezel integrates with your cabinet design.
Installation Complexity
Some bezels require permanent modification of your cabinet, while others use removable mounting systems. If you anticipate changing your setup in the future, look for bezels that can be easily removed or adjusted.
Budget Planning
Arcade bezels range widely in price. Basic plastic bezels and blank coin doors offer budget-friendly options for cost-conscious builders. Premium components like working coin mechanisms and custom-cut acrylic add to the cost but improve the finished appearance.
FAQ’s
How do you make a DIY arcade bezel?
To make a DIY arcade bezel, start by measuring your monitor and cabinet opening. Cut black card stock or thin plywood to create a frame that covers the gap between the monitor and cabinet. For curved CRT bezels, create a paper template first, then transfer the pattern to your final material. Attach using wood runners or adhesive, ensuring the bezel blocks light spill from the marquee.
What materials are best for arcade bezels?
The best materials for arcade bezels are acrylic or perspex sheets (3-6mm thickness), heavy black card stock for budget builds, and plastic molding for LCD conversions. Acrylic offers durability and professional appearance, while card stock works for temporary or low-budget solutions. Metal construction is ideal for coin doors and high-wear components.
What is the difference between digital and physical bezels?
Physical bezels are physical frames that sit between your monitor and cabinet glass, hiding internal components. Digital bezels are software overlays displayed on screen around the game image in emulators like RetroArch and MAME. Physical bezels provide authentic arcade aesthetics, while digital bezels offer flexibility for multi-game systems.
How thick should perspex be for arcade cabinets?
For arcade cabinet bezels, perspex or acrylic should be at least 3mm thick for flat panels and 6mm for curved applications. Thinner material (2mm) tends to buckle and warp, especially with heat from monitors. Thicker acrylic provides better rigidity and resists scratches, but costs more and is harder to cut.
How do I prevent light spill from the marquee in the bezel area?
To prevent light spill, add a lip or overhang to the top edge of your bezel that extends over the marquee light. Use black paint or tape on the inside edges where the bezel meets the cabinet. Ensure tight seals between the bezel and cabinet walls. Some builders use foam weather stripping to create a light seal.
Conclusion
Finding the right arcade bezels for your DIY cabinet project transforms a homemade build into something that looks professional and authentic. The 19 inch LCD Plastic Monitor Bezel remains my top pick for LCD upgrades due to its professional fit and trimmable design. For builders wanting authentic arcade experiences, the mechanical coin door delivers that satisfying quarter-drop feel.
Whether you are restoring a classic cabinet, building a multicade from scratch, or setting up a multi-monitor gaming rig, the right bezel makes all the difference. Take accurate measurements, consider your monitor type, and choose components that match your skill level and budget.