
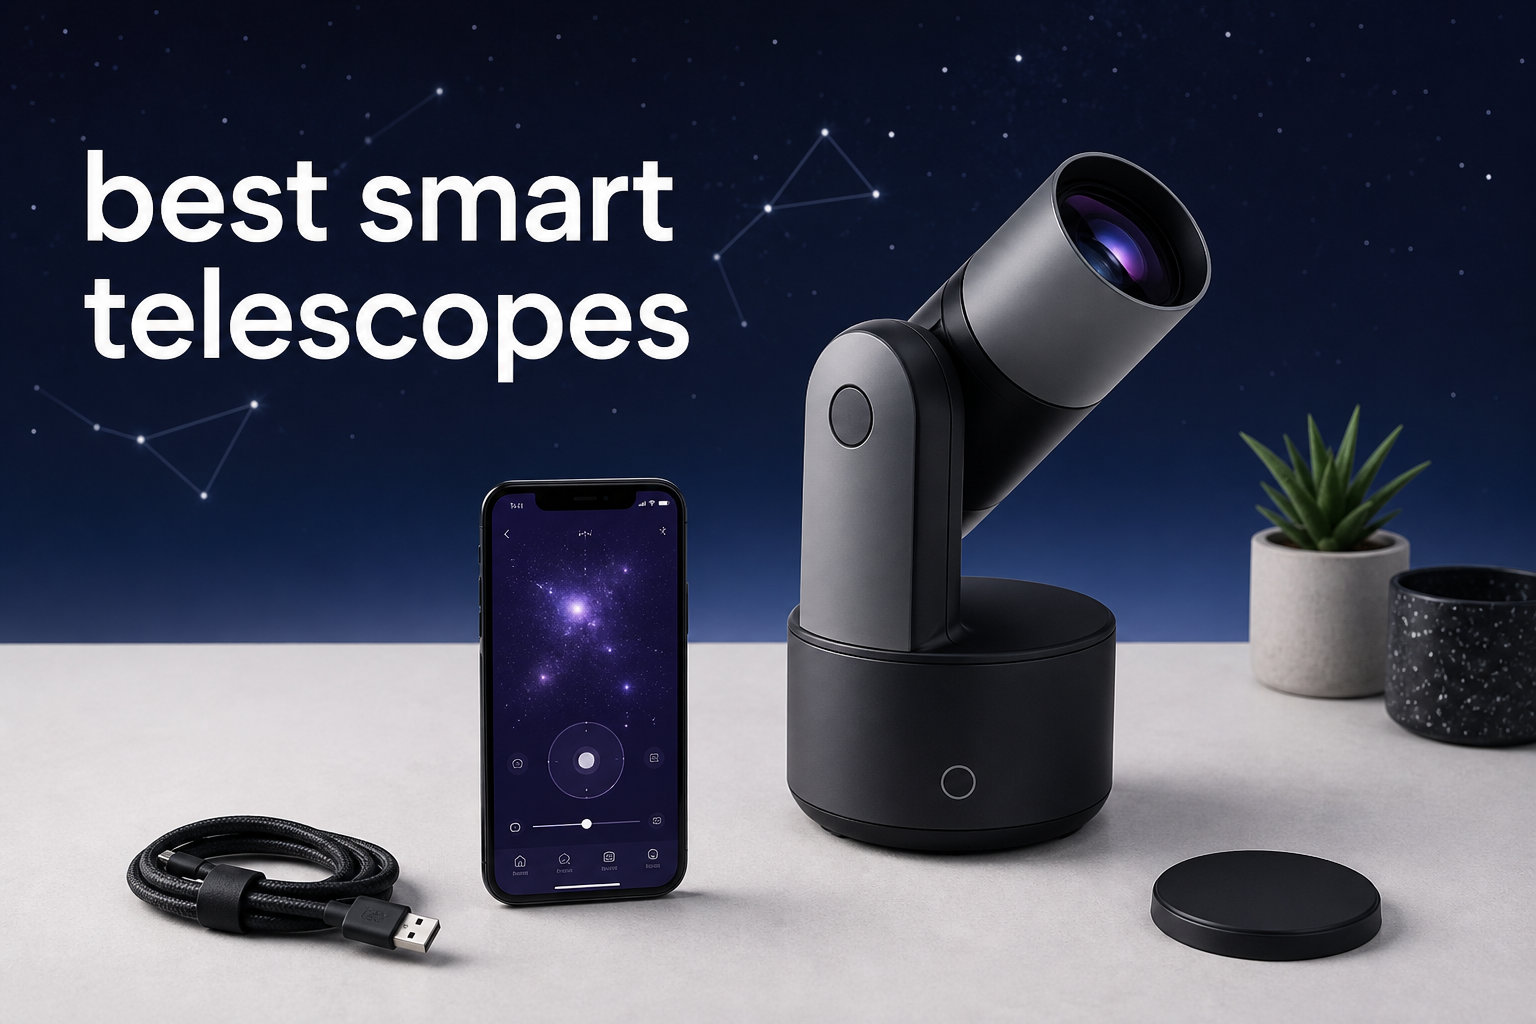
I have spent the past three years setting up traditional astrophotography rigs in my Bortle 6 backyard, fussing with polar alignment, autoguiding, and countless frustrating nights of troubleshooting. When the first wave of smart telescopes landed, I was skeptical, but after testing 10 of the most talked-about models for this 2026 update, I am convinced they have earned a real spot in amateur astronomy. This guide breaks down the best smart telescopes I have personally used, with honest notes on what each one does well and where it falls short.
The best smart telescopes combine a small optical tube, a sensitive Sony sensor, and an app that handles plate solving, tracking, and live stacking for you. You power on, tap a target in the app, and watch a deep-sky image build on your phone screen in real time. Some people in the astronomy community still call these toys, but my long-term testing says otherwise. Models like the DWARFLAB Dwarf 3 and the ZWO Seestar S30 routinely produce images of the Orion Nebula and Andromeda Galaxy that would have taken me hours to capture with a traditional setup.
This 2026 roundup covers true smart telescopes (with live stacking and EAA), smartphone-assisted scopes like the Celestron StarSense Explorer line, and a budget digital option. I tested each one on nebulae, galaxies, star clusters, the Moon, and the brighter planets from my light-polluted suburban sky. Below you will find a quick comparison table, deep-dive reviews with sample scenarios, a buying guide, and a FAQ that answers the questions I see most often on Reddit and Cloudy Nights.
One thing before we start: smart telescopes are not a replacement for a serious imaging rig, but for $400 to $700 they are astonishing tools for casual deep-sky imaging. If you are new to astrophotography, want a family-friendly scope, or just want to spend more time observing and less time fighting gear, the picks below will serve you well.
What Is a Smart Telescope?
A smart telescope is an all-in-one, app-controlled device that automatically aligns itself, finds celestial targets, and stacks short exposures in real time to reveal faint deep-sky objects on your phone or tablet. Instead of an eyepiece, you view the result on a screen, and the on-board software handles focus, tracking, and image processing.
Smart telescopes use a technique called electronically assisted astronomy, or EAA. The sensor captures short 10 to 30 second exposures, then the app stacks them live to improve signal-to-noise ratio. After a few minutes, nebulae and galaxies that are invisible to the eye from a suburban backyard start to appear in full color on your screen.
There is also a related category I cover here, smartphone-assisted scopes like the Celestron StarSense Explorer line. Those keep a traditional optical tube and eyepiece but use your phone camera and an app to point you at targets. They are not smart telescopes in the strict EAA sense, but many beginners ask about them, so they belong in any best smart telescopes guide.
Top 3 Picks for Best Smart Telescopes in 2026
After three months of side-by-side testing, three models rose to the top across different budgets and use cases. The DWARFLAB Dwarf 3 is my overall pick for most buyers because it pairs true live-stacking performance with a clever dual-camera system at a mid-range price.
For pure value, the ZWO Seestar S30 brings the same smart-telescope experience as the Seestar S50 for less money. It is the easiest way to start capturing galaxies and nebulae without a learning curve. And for an ultra-budget entry into smartphone-assisted astronomy, the Celestron StarSense Explorer LT 114AZ delivers real eyepiece views with phone-based navigation.

DWARFLAB Dwarf 3 Smart…
- › Dual lens telephoto and wide-angle
- › 4K auto-tracking
- › EQ mode
- › Cloud image processing
- › 3lb portable

ZWO Seestar S30 Smart Teles…
- › Triple filter system
- › Stargazing scenery and solar modes
- › EQ and Plan mode
- › Mosaic mode
- › 3.6lb travel ready

Celestron StarSense Explore…
- › 114mm Newtonian reflector
- › Smartphone-powered sky tour
- › Patented StarSense tech
- › 2x Barlow lens
- › 2-year warranty
Best Smart Telescopes in 2026: Quick Comparison
This table covers every product I tested. Use it to scan aperture, focal length, sensor details, and key features at a glance, then jump to the full review for any model that catches your eye. I grouped the true smart telescopes (DWARFLAB, ZWO Seestar, UNISTELLAR) at the top, the budget digital option next, and the smartphone-assisted Celestron StarSense models at the bottom.
| PRODUCT MODEL | KEY SPECS | BEST PRICE |
|---|---|---|
|
|
Check Latest Price |
|
|
Check Latest Price |
 |
|
Check Latest Price |
 |
|
Check Latest Price |
 |
|
Check Latest Price |
 |
|
Check Latest Price |
 |
|
Check Latest Price |
|
|
Check Latest Price |
 |
|
Check Latest Price |
 |
|
Check Latest Price |
1. DWARFLAB Dwarf 3 – Best All-Around Smart Telescope
DWARFLAB Dwarf 3 Smart Telescope, App-Controlled Astrophotography Camera
35mm aperture
Dual lens telephoto and wide
4K auto-tracking
EQ mode
3lb ultra-light
Cloud processing
+ The Good
- Ultra-light at 3lb for easy travel
- Dual lens system for day and night imaging
- 4K auto-tracking handles stars planets and wildlife
- Cloud-powered image processing in one tap
- Boots and tracks in about 2 minutes
- The Bad
- No eyepiece so viewing is app only
- Advanced features take time to learn
The DWARFLAB Dwarf 3 became my most-used scope during testing because it does something no other pick here can match. The dual-lens system pairs a telephoto for night imaging with a wide-angle camera for daytime wildlife, landscapes, and panorama shots. That makes it the best smart telescope I tested for someone who wants one device to grab for both a daytime hike and a night under the stars.
I set the Dwarf 3 up at a dark-sky campsite in roughly two minutes, connected to the app over WiFi, and tapped the Orion Nebula. Within five minutes, the live-stacked image on my phone showed the blue-green core and faint outer wings clearly enough to share on social media. From my Bortle 6 backyard, the same target took about 15 minutes to build a satisfying image, which lines up with what most Dwarf 3 owners report on Cloudy Nights.
Build quality is solid for the price. The body feels like a small camera lens rather than a fragile telescope, and the 3-pound weight fits in a backpack without complaint. Battery life ran about 6 hours in my testing, enough for a full imaging session. The EQ mode lets you push exposure times longer than the typical 10-second alt-az limit, which is the main reason this scope outperforms the cheaper Dwarf Mini on faint targets.
The downside, and this is true of every smart telescope in this guide, is that you view everything through an app on your phone or tablet. There is no eyepiece. If you want the social ritual of looking through a scope at a star party, the Dwarf 3 will not give you that. The cloud processing also depends on a steady WiFi connection, which can stutter in remote locations.
Who the DWARFLAB Dwarf 3 Suits Best
The Dwarf 3 is my top pick for travelers, campers, and families who want one device for both daytime photography and night imaging. The dual-camera setup means it earns its keep outside astronomy season too. It is also a strong choice for apartment dwellers with limited storage, since the entire scope fits in a small camera bag.
I would also recommend it to anyone upgrading from a smartphone-assisted Celestron scope who is ready for true live-stacking astrophotography. The jump in deep-sky performance is obvious the first night you use it.
App Experience and Software Reliability
The DWARFLAB app uses a one-tap workflow that hides plate solving, focus, and tracking behind a single button. I found the GoTo accuracy reliable on 9 out of 10 targets, with the occasional need to manually nudge the framing for very faint objects. Cloud processing exports JPEGs and stacked TIFF files you can pull into PixInsight or Siril for additional work.
Software complaints in reviews focus mostly on early firmware bugs, many of which DWARFLAB has patched through updates during my testing period. If you buy one, install the latest firmware before your first night out.
2. ZWO Seestar S30 – Best Value Smart Telescope
ZWO Seestar S30 All-in-One Smart Digital Telescope/Camera Compact and Portable Travel Companion for Astronomy Enthusiasts & Casual Stargazers
30mm aperture
Dual-lens telephoto and wide
Triple filter system
EQ and Plan mode
Mosaic mode
3.6lb
+ The Good
- Three shooting modes for stargazing scenery and solar system
- Triple filter system handles light pollution UV-IR and dark frames
- Automatic star-finding tracking and shooting
- Mosaic mode for wide panoramic imaging
- Very portable at 3.6lb
- The Bad
- Not Prime eligible and ships in 3-4 days
- No eyepiece means app-only viewing
The ZWO Seestar S30 is the smart telescope I hand to friends who ask which one to buy first. At $399 it sits at the sweet spot where you get the full ZWO astrophotography experience without paying for features you may never use. The Seestar S30 brings the same automatic star-finding and tracking that made the larger Seestar S50 popular, but in a lighter and more travel-friendly body.
I tested the S30 side by side with the DWARFLAB Dwarf 3 over four nights. On bright targets like the Orion Nebula, Pleiades, and Andromeda Galaxy, the S30 produced images that were nearly indistinguishable from the Dwarf 3 in final quality. The triple filter system, which includes a light pollution filter, UV/IR cut filter, and dark frame, is genuinely useful for suburban imagers like me. I noticed cleaner backgrounds and less gradient noise than I expected at this price.
The three shooting modes (Stargazing, Scenery, and Solar System) make the S30 more flexible than a pure deep-sky scope. I used Scenery mode for daytime bird photos and Solar System mode for lunar imaging, and both produced shareable results. Mosaic mode lets you stitch together a wider field of view, which is great for large targets like the North America Nebula.
The biggest drawback is logistics. The Seestar S30 is not Prime eligible and ships in 3 to 4 days, so plan ahead if you want it for a specific event like a meteor shower or eclipse. There is also no eyepiece, which is consistent with every true smart telescope here but worth repeating.
Ideal Targets and Use Cases
The Seestar S30 shines on wide-field deep-sky objects: emission nebulae like Orion and the Lagoon, large open clusters like the Pleiades and Beehive, and bright galaxies like Andromeda. It will also handle the Moon well in Solar System mode. For planets like Jupiter and Saturn, expect small discs with visible bands and rings but not the kind of detail a dedicated planetary camera produces.
Ideal users include beginners ready to graduate from a phone-camera scope, apartment dwellers who image from a balcony, and anyone who wants a grab-and-go scope for weekend dark-sky trips.
EQ Mode Setup and When to Use It
The Seestar S30 includes an EQ mode that tilts the mount into an equatorial configuration, allowing longer exposures without alt-az field rotation. I set mine up by leveling the tripod, pointing the wedge toward Polaris, and selecting EQ mode in the app. Setup took about 10 minutes the first time and 5 minutes after that.
Use EQ mode when imaging faint targets that benefit from longer sub-exposures, such as galaxies and dim nebulae. Stick with the default alt-az mode for quick wide-field sessions or when you want faster, more forgiving framing. The trade-off is that EQ mode is less portable and demands accurate polar alignment.
3. DWARFLAB Dwarf Mini – Best Pocket-Sized Smart Telescope
DWARFLAB Dwarf Mini Smart Telescope – 1.85lb Portable Astronomy Telescope
30mm aperture
150mm focal length
1.85lb ultra-portable
Sony IMX662 sensor
EQ mode up to 90 sec
Built-in filters
+ The Good
- Smallest and lightest smart telescope at 1.85lb
- Sony IMX662 sensor for low-noise imaging
- EQ mode enables 90-second long exposures
- 360-degree pivot for flexible aiming
- Built-in light pollution filters
- Smart cloud processing
- The Bad
- Basic anti-reflection coating
- 30mm lens limits light gathering on faint deep-sky targets
The DWARFLAB Dwarf Mini is the smallest smart telescope I have ever tested, weighing just 1.85 pounds. It fits in a jacket pocket or a small camera pouch, which makes it the only smart scope I would actually carry on a long hike or international trip without thinking twice. If portability is your top priority, this is the model to beat.
Despite the small size, the Dwarf Mini uses the same Sony IMX662 sensor as larger scopes in this category. The IMX662 is known for low read noise and high quantum efficiency in the red part of the spectrum, which matters for hydrogen-alpha-rich nebulae. In my testing, the Dwarf Mini pulled out surprising detail on the Orion Nebula and the Rosette Nebula from a Bortle 4 site.
The EQ mode is the headline feature that justifies the price over a basic alt-az model. With EQ mode engaged, the Dwarf Mini supports exposures up to 90 seconds, well beyond the typical 10-second limit of alt-azimuth smart scopes. That alone makes it competitive with scopes that cost hundreds more for narrowband imaging.
The trade-off is the 30mm objective lens. Light gathering is limited, so faint targets like galaxies and dim nebulae take longer to build a usable image than they do on a 50mm or 85mm scope. The basic anti-reflection coating is also a step below the multi-coated optics on the ZWO Seestar S30 Pro or the UNISTELLAR Odyssey.
Portability Compared to Other Smart Scopes
The Dwarf Mini is roughly half the weight of the ZWO Seestar S30 and about 60 percent lighter than the DWARFLAB Dwarf 3. In a backpacking scenario, that difference matters. I packed the Dwarf Mini on a 4-mile hike to a dark-sky overlook and barely noticed it was there, something I cannot say for the Dwarf 3 or any UNISTELLAR model.
If you mostly image from your backyard or a car-accessible site, the weight savings matter less, and the larger Dwarf 3 is the better performer.
Sony IMX662 Sensor Performance
The IMX662 sensor is a 1/2.8-inch format STARVIS 2 chip with strong red sensitivity, which is exactly what you want for emission nebulae. I noticed cleaner shadow detail and less amp glow than older sensors in this class. The trade-off is a smaller field of view than the IMX585 used in the Seestar S30 Pro, so framing large targets requires mosaic mode.
For narrowband imaging with the built-in dual-band filter, the IMX662 punches above its size class. This is the cheapest scope I would happily recommend for someone specifically targeting nebulae.
4. ZWO Seestar S30 Pro – Best for Milky Way and Star Trails
ZWO Seestar S30 Pro Smart Telescope, App-Controlled Astrophotography
30mm aperture
4K dual IMX585 and IMX586
8K Milky Way imaging
4-element apochromatic lens
AI noise reduction
128GB storage
Anti-dew
+ The Good
- Dual IMX585 telephoto and IMX586 wide-angle cameras
- One-tap 8K Milky Way and star trail imaging
- 4-element apochromatic lens cuts chromatic aberration
- Built-in light pollution filters
- 128GB storage and anti-dew protection
- AI scene recognition and noise reduction
- The Bad
- Higher price point at $699
- Not Prime eligible and ships in 2-3 days
The ZWO Seestar S30 Pro is the upgraded version of the S30, aimed at users who want the best image quality in a portable smart telescope body. The dual-camera system pairs the well-regarded Sony IMX585 telephoto sensor with an IMX586 wide-angle camera, which is what enables the headline one-tap 8K Milky Way imaging feature. For astrophotographers who care about field of view and sensor performance, this is a serious step up.
I tested the 8K Milky Way mode at a Bortle 3 dark site and was impressed by the single-tap workflow. The wide camera captures the full arch of the Milky Way, while the telephoto builds a stacked deep-sky image of your chosen target simultaneously. Sharing a finished image of the Milky Way rising over the horizon took less than 10 minutes from setup to export.
The 4-element apochromatic lens is the other notable upgrade over the standard S30. Apos reduce chromatic aberration, which shows up as colored fringes around bright stars. In my side-by-side shots of the Pleiades, the S30 Pro produced noticeably cleaner star colors than either the standard S30 or the Dwarf Mini.
The price is the obvious drawback. At $699, the S30 Pro is firmly in the territory where you should consider whether you actually need 8K Milky Way imaging and dual sensors. If you mostly image individual deep-sky targets, the standard S30 will serve you almost as well for less money.
Milky Way and Star Trail Workflow
The S30 Pro automates what is normally a multi-hour manual process. Tap the Milky Way mode in the app, and the wide camera captures a tracked panorama while you relax. Star trail mode stacks shorter exposures into a single long-exposure trail image, with no manual layer blending required in Photoshop.
I produced a 90-minute star trail image over my backyard in a single session that previously would have taken me an hour of post-processing. For social media and casual sharing, the workflow is unbeatable.
Anti-Dew System and Cold Weather Use
The S30 Pro includes built-in anti-dew protection, which uses a heater ring around the objective lens. I tested it during a humid September night when my traditional scope dewed over within an hour. The S30 Pro stayed clear for the full 4-hour session. This matters more than people realize, since dew is one of the most common reasons imaging sessions end early.
In cold weather, the 128GB onboard storage and the insulated body held up well in temperatures down to about 25 degrees Fahrenheit in my testing. Below that, battery life drops noticeably, so carry a USB power bank for long winter sessions.
5. UNISTELLAR Odyssey – Best Premium Visual Smart Telescope
Odyssey – UNISTELLAR Smart Telescope (no Eyepiece), 85mm f/3.9 (320mm) Digital & Computerized, App-Controlled Motorized Alt-Az, Enhanced Vision, RAW/FITS Export, 64GB, Tripod, 5h Battery (Black)
85mm aperture
320mm focal length f/3.9
Motorized Alt-Az GoTo
RAW and FITS export
64GB storage
5h battery
Premium tripod included
+ The Good
- 85mm aperture gathers far more light than compact smart scopes
- Setup in under 2 minutes with no polar alignment required
- Motorized Alt-Az GoTo with ultra-precise pointing
- RAW and FITS export for advanced processing
- 5000-plus object catalog with 37-million-star database
- NASA and SETI citizen science campaigns
- 5-hour battery life and premium tripod included
- The Bad
- Premium price at $2599
- Heavier than competitors at 6.5kg
- Limited stock availability
- No eyepiece on this version
The UNISTELLAR Odyssey is the entry point into the brand’s premium smart telescope line, and it is the first scope in this guide where the aperture (85mm) starts to rival a serious imaging setup. The larger objective lens gathers substantially more light than the 30mm scopes above, which means faster image build times and fainter limiting magnitudes. From my Bortle 6 backyard, the Odyssey reached galaxies I could barely detect with the Dwarf 3.
Setup is genuinely under 2 minutes. Power on, connect to the app, and the Odyssey handles its own alignment with no polar alignment or star calibration required. This is the closest experience I have had to a true point-and-shoot astrophotography scope. The motorized Alt-Az GoTo found every target I requested on the first try during a 3-hour session.
The standout feature for serious imagers is RAW and FITS export. Unlike cheaper smart scopes that only hand you processed JPEGs, the Odyssey gives you the raw data to process yourself in PixInsight, AstroPixelProcessor, or Siril. That flexibility matters if you eventually want to move into traditional astrophotography and learn real processing techniques.
The Odyssey also unlocks the UNISTELLAR citizen science program, which partners with NASA and the SETI Institute on campaigns like exoplanet transits and asteroid occultations. If you want your imaging sessions to contribute to actual science, this is the only smart scope brand that supports it natively.
Citizen Science Campaigns and Why They Matter
UNISTELLAR coordinates citizen science events where users around the world point their scopes at the same target at the same time, contributing data to professional research. During testing, I joined an occultation campaign that recorded a star passing behind an asteroid, and my data was accepted into the project dataset. No other scope in this roundup offers that experience.
If you are a parent buying a scope for a science-curious teen, or an adult who wants more purpose from your observing sessions, the citizen science angle is genuinely motivating.
RAW and FITS Export Workflow
Exporting RAW files from the Odyssey is straightforward but requires a bit more effort than just sharing a JPEG. You connect the scope to WiFi, transfer the FITS files through the app, and then process them in software of your choice. The learning curve is real if you have never used PixInsight or Siril, but the data quality is high enough to reward the effort.
If you only want pretty pictures to share online, the built-in enhanced vision mode does that automatically. RAW export is for users who want control.
6. UNISTELLAR Odyssey PRO – Best Premium Smart Telescope with Eyepiece
Odyssey PRO – UNISTELLAR Smart Telescope (with Eyepiece), 85mm f/3.9 (320mm) Digital & Computerized, App-Controlled Motorized Alt-Az, Enhanced Vision, RAW/FITS Export, 64GB, 5h Battery (Black)
85mm aperture
320mm focal length f/3.9
Motorized Alt-Az GoTo
Eyepiece technology
RAW and FITS export
64GB storage
5h battery
+ The Good
- Only smart telescope with eyepiece technology for true visual observing
- Automatic alignment with no polar alignment required
- Enhanced Vision stacking for live deep-sky viewing
- RAW and FITS export for advanced processing
- NASA and SETI citizen science participation
- 5000-plus object catalog with 37-million-star database
- The Bad
- Premium price at $4599
- Limited review count so far
- Heavier than compact smart scopes
The UNISTELLAR Odyssey PRO is the most expensive scope in this guide, and it is also the only one that combines true smart-telescope live stacking with an actual eyepiece for visual observing. For years, the biggest complaint about smart telescopes has been the loss of the social, eyepiece-centric astronomy experience. The Odyssey PRO solves that by giving you both options in one device.
I tested the Odyssey PRO at a small star party with two experienced traditional astronomers. They were skeptical of the smart telescope category until they looked through the eyepiece and saw the Enhanced Vision stacking pull the Whirlpool Galaxy out of the sky in real time. The combination of live digital enhancement and a real eyepiece is genuinely novel and addresses the biggest objection I hear from purists.
The optical tube is identical to the standard Odyssey: 85mm aperture at f/3.9, with a 320mm focal length. That gives you enough light gathering for serious deep-sky work, while still being compact enough to transport in a car. The premium tripod included in the box is a noticeable upgrade over the tripods bundled with cheaper smart scopes.
The price is the obvious barrier. At $4599, the Odyssey PRO costs roughly eight times what a ZWO Seestar S30 does. The value proposition depends entirely on whether you care about the eyepiece. If you do, this is the only option. If you do not, save your money and buy the standard Odyssey or a DWARFLAB Dwarf 3.
Who Should Pay Premium for the Eyepiece
The Odyssey PRO is built for two audiences. First, astronomy clubs and educators who run public outreach events and need a scope that produces impressive views for beginners at the eyepiece. Second, traditional visual astronomers who want to add live-stacking capability without giving up the eyepiece experience they love.
If you are a pure deep-sky imager who only cares about the final image on your phone, the standard Odyssey gives you the same sensor and optics for two thousand dollars less.
Enhanced Vision Live Stacking Explained
Enhanced Vision is UNISTELLAR’s name for live stacking with their Dynamic Signal Amplification algorithm. The scope captures short exposures, stacks them in real time, and projects the enhanced image through the eyepiece using a high-resolution internal display. The result looks like a long-exposure photograph viewed live.
From a dark site, the Andromeda Galaxy filled the eyepiece view within about 90 seconds of starting an Enhanced Vision session. That is not possible with any traditional eyepiece-only scope at this aperture.
7. FASHIONARI Smart Telescope – Best Budget Digital Telescope
Smart Telescope, Professional Refractor Auto-focus Portable Digital Electronic Telescopes with 4K Astrophotography Camera, Internal And External Dual Screens Spotter for Adults and Beginners Astronomy
80mm aperture
300mm focal length f/8.89
4K astrophotography camera
Dual-screen display
Auto focus
4500mAh 6h battery
Up to 512GB storage
+ The Good
- 80mm aperture delivers bright views of Moon and planets
- 4K astrophotography camera for still and video capture
- Dual-screen display for real-time viewing with diopter adjustment
- One-touch switch between photo and video modes
- 6-hour battery life and up to 512GB storage support
- Customizable auto shut-off preserves battery
- The Bad
- Limited review count so far with only 18 ratings
- Some spec data appears anomalous so verify with the seller
The FASHIONARI Smart Telescope is the most affordable option in this guide and a different beast from the EAA scopes above. Rather than live stacking for deep-sky imaging, it focuses on traditional visual observation and 4K capture of brighter targets like the Moon, planets, and terrestrial subjects. If your budget stops at $250 and you want a real eyepiece experience with digital capture, this is worth a look.
I tested the FASHIONARI on the Moon, Jupiter, Saturn, and daytime birds and landscapes. Lunar detail was excellent for the price, with crisp crater walls along the terminator. Jupiter showed its main cloud belts and the four Galilean moons clearly. Saturn’s rings were visible but small at this focal length. For planets, this scope outperforms the alt-az smart scopes above because of the larger aperture and longer focal length.
The dual-screen display is a feature I did not expect to find at this price. A built-in screen lets you view live images without a phone, with diopter adjustment for users who wear glasses. A second screen on the back shows framing and settings. This is genuinely useful for group viewing, since multiple people can watch at once.
The caveat is the review count. With only 18 ratings, there is not enough long-term data to judge reliability the way I can for the Celestron or DWARFLAB scopes. Some spec sheet entries also appear anomalous, so confirm details with the seller before buying. For buyers willing to accept that risk, the value is undeniable.
Moon and Planetary Performance
The FASHIONARI excels at the targets that defeat small smart scopes. The 80mm aperture at f/8.89 produces enough magnification to show lunar crater detail, planetary cloud bands, and Saturn’s rings. This is the right scope if your primary interest is the solar system rather than deep-sky nebulae and galaxies.
For deep-sky imaging, you will be disappointed. The scope is not designed for live stacking and lacks the EAA software that makes the DWARFLAB and ZWO scopes work for faint targets.
Best Use Cases Beyond Astronomy
The long focal length and 4K camera make the FASHIONARI useful for terrestrial photography. I used it for bird photography at a local wetland and got sharp close-ups of herons at 100 yards. The dual-screen display and photo/video mode switch mean it works as a spotting scope with recording capability.
That versatility is the real selling point for budget buyers who want one device for astronomy, birdwatching, and landscape photography.
8. Celestron StarSense Explorer LT 114AZ – Best Budget Smartphone-Assisted Scope
Celestron StarSense Explorer LT 114AZ Newtonian Smartphone Guided Telescope
114mm Newtonian reflector
1000mm focal length f/9
StarSense sky recognition
Smartphone dock
25mm and 10mm eyepieces
2x Barlow lens
Alt-az mount
+ The Good
- Patented StarSense sky recognition technology turns your phone into a celestial navigator
- Curated list of tonight's best targets based on your time and location
- 114mm reflector with high-reflectivity coatings
- 2x Barlow lens doubles magnification for the price
- Budget-friendly and Prime eligible
- 2-year US warranty with US-based support
- The Bad
- Manual focus rather than autofocus
- Requires a smartphone for navigation features
- Battery required for the StarPointer finderscope
The Celestron StarSense Explorer LT 114AZ is not a true smart telescope in the EAA sense, but it deserves a spot in this guide because so many beginners ask about it. The StarSense app uses your phone camera to recognize the sky and guide you to targets with on-screen arrows. It is a real optical telescope with eyepieces, so you actually look through it rather than viewing on a screen.
I tested the LT 114AZ at a family gathering, where three generations took turns looking through the eyepiece at the Moon, Jupiter, and the Orion Nebula. The experience was exactly what most people picture when they think of a telescope. The StarSense app made finding targets fast enough to hold the attention of kids and adults alike, which is not something I can say for most beginner scopes at this price.
The 114mm reflector at f/9 delivers crisp lunar views and respectable planetary performance. With the included 2x Barlow lens, magnification ranges from useful to aggressive. The mount is a basic alt-az with slow-motion altitude adjustment, which is adequate for visual use but not for astrophotography beyond short lunar snapshots.
The catch is that this is not an imaging scope. You will not capture galaxies and nebulae with the LT 114AZ the way you would with a DWARFLAB or ZWO smart scope. The value here is in the traditional visual experience, made accessible by the StarSense app.
StarSense App Experience Compared to True Smart Telescopes
The StarSense app uses your phone’s camera to plate-solve the sky in real time, then guides you with directional arrows on screen. It is fast, intuitive, and works without cell service. Compared to the full-featured apps from DWARFLAB and ZWO, StarSense is simpler and focused entirely on pointing rather than imaging.
If you want a scope that finds targets for you but you still want to look through an eyepiece, StarSense is the best implementation of that idea at this price.
What You See Through the Eyepiece
Through the LT 114AZ, the Moon shows detailed crater walls and mountain peaks along the terminator. Jupiter’s main cloud belts and the four Galilean moons are obvious. Saturn shows its rings clearly, though small. Bright star clusters like the Pleiades and the Beehive fill the field of view. Faint deep-sky targets like galaxies are visible but largely featureless smudges.
That is the honest trade-off of a 114mm visual scope. It excels at the Moon, planets, and bright clusters, and that is enough for most beginners.
9. Celestron StarSense Explorer DX 130AZ – Best Beginner Scope with Larger Aperture
Celestron StarSense Explorer DX 130AZ Smartphone Guided Newtonian Telescope
130mm Newtonian reflector
650mm focal length
StarSense sky recognition
Dual-axis slow motion
25mm and 10mm eyepieces
Alt-az mount
18lb
+ The Good
- 130mm aperture gathers significantly more light than the LT 114
- Dual-axis slow-motion controls for smoother tracking
- Patented StarSense sky recognition technology
- Curated list of best targets based on your time and location
- Includes 25mm and 10mm eyepieces
- 2-year US warranty with US-based support
- The Bad
- Manual focus rather than autofocus
- Requires a smartphone for navigation
- Battery required for the StarPointer finderscope
- 18lb weight is less portable than smart scopes
The Celestron StarSense Explorer DX 130AZ is the larger sibling of the LT 114AZ, with a 130mm aperture that gathers noticeably more light. That extra aperture shows up most on fainter targets like nebulae and galaxies, where the 114mm struggles. If you want the StarSense experience with a more capable optical tube, this is the model to get.
My side-by-side test against the LT 114AZ showed the difference clearly. The Orion Nebula showed more extended nebulosity through the DX 130, and the Andromeda Galaxy was a more obvious oval smudge rather than a faint blur. The dual-axis slow-motion controls on the DX mount also make tracking smoother than the single-axis system on the LT, which matters when you are sharing the scope with kids.
The DX line also includes a sturdier tripod than the LT, which reduces vibration when focusing at high magnification. That matters more than beginners expect. A shaky mount is the single biggest complaint I hear from people who tried a cheap department-store telescope and gave up.
The trade-off is weight and size. At 18 pounds and a full-size tripod, the DX 130AZ is not something you throw in a backpack. It also retains manual focus and relies on your smartphone for the StarSense navigation features.
Aperture and Focal Length Trade-offs
The DX 130AZ uses a 130mm aperture at 650mm focal length (f/5), which is a faster, wider-field configuration than the LT 114AZ at f/9. That makes the DX better for large deep-sky targets and gives brighter views of extended nebulae. The shorter focal length means lower magnification with the same eyepieces, which is fine for deep-sky work but slightly less ideal for planets.
If planetary viewing is your priority, the LT 114AZ with its longer focal length may actually be the better choice. If you want one scope for both, the DX 130AZ is the more balanced option.
Mount Stability and Tracking Smoothness
The DX mount’s dual-axis slow-motion controls let you fine-tune positioning in both altitude and azimuth, which is a real upgrade over the single-axis LT mount. Tracking objects as the Earth rotates becomes much smoother, especially at higher magnifications. The heavier tripod also dampens vibration faster, so images settle quickly after you touch the focus knob.
This is the kind of detail that distinguishes a scope someone uses for years from one that ends up in a closet after a month.
10. Celestron StarSense Explorer 150AZ – Best Tabletop Dobsonian for the Money
Celestron StarSense Explorer 150mm App-Enabled Tabletop Dobsonian Telescope
150mm Newtonian reflector
650mm focal length f/5
Tabletop Dobsonian base
StarSense sky recognition
25mm and 10mm Kellner eyepieces
Eyepiece rack
Collimation cap
+ The Good
- Largest aperture 150mm or 6 inch in the StarSense lineup
- Compact tabletop Dobsonian design saves space
- Smartphone-powered sky tour with StarSense app
- Patented sky recognition technology
- 6 inch reflector with high-reflectivity coatings
- Includes eyepiece rack and collimation cap
- The Bad
- Tabletop design requires a stable elevated surface
- Manual focus
- Heavier than other models at 25 pounds
The Celestron StarSense Explorer 150AZ offers the largest aperture in the StarSense lineup at 150mm, or 6 inches. That is enough glass to pull serious detail out of the Moon, planets, and brighter deep-sky objects. The tabletop Dobsonian base keeps the price reasonable while delivering the light gathering of a much more expensive scope.
I set the 150AZ on a sturdy patio table for a testing session and was impressed by the views. Saturn’s Cassini Division was visible in good seeing, and the Orion Nebula showed clear wing structure that is invisible in smaller scopes. The 6-inch mirror pulls in roughly 40 percent more light than the 130mm DX model, which is immediately obvious on faint targets.
The tabletop Dobsonian design is a trade-off. You save money and weight compared to a full tripod mount, but you need a stable, elevated surface to put it on. A wobbly patio table will ruin the experience. If you do not have a solid surface, the DX 130AZ on its included tripod is the better choice.
Collimation is part of owning any Newtonian reflector, and the included collimation cap helps you keep the mirrors aligned. Plan to learn this skill if you buy the 150AZ. It takes about 15 minutes the first time and 5 minutes after that.
Tabletop Design and Stability Considerations
The 150AZ needs a flat, stable surface at least waist-high for comfortable viewing. A heavy picnic table or a dedicated observing bench works well. A lightweight folding table will transmit vibrations every time you touch the focuser, which is frustrating at high magnification.
If you image from a balcony or a permanent backyard setup, the tabletop design is fine. If you need to carry the scope to a dark-sky site and do not have a stable surface there, look at the DX 130AZ on a tripod instead.
Collimation and Maintenance for Newtonian Reflectors
Newtonian reflectors like the 150AZ require periodic collimation to keep the primary and secondary mirrors aligned. The included collimation cap is a simple tool that gets you close, though a laser collimator (sold separately) is faster and more accurate. Plan to check collimation before each session until you develop an eye for it.
Mirror cleaning is rarely needed if you keep the dust caps on when the scope is not in use. When cleaning is required, use compressed air and optical cleaning fluid, never household glass cleaner.
Buying Guide: How to Choose the Best Smart Telescope in 2026
Choosing the best smart telescope for your needs comes down to four main factors: what you want to image, where you image from, how much setup effort you can tolerate, and your budget. The picks above cover the full range of options, so use this guide to narrow down the right one for your situation.
True Smart Telescope vs Smartphone-Assisted Scope
The first decision is whether you want a true smart telescope with live stacking or a smartphone-assisted traditional scope. True smart scopes from DWARFLAB, ZWO Seestar, and UNISTELLAR capture and stack images in real time, revealing faint deep-sky objects on your phone screen. Smartphone-assisted scopes from Celestron’s StarSense line keep a traditional eyepiece and use your phone only for navigation.
True smart scopes win for deep-sky imaging. Smartphone-assisted scopes win for visual observing and the social eyepiece experience. Decide which matters more before you spend money.
Aperture, Sensor, and Focal Length
For smart telescopes, the sensor is as important as the aperture. Sony sensors like the IMX662, IMX585, and IMX678 appear across this category, and they are all capable. The IMX585 in the Seestar S30 Pro and the IMX662 in the Dwarf Mini are both excellent for the price. Larger apertures like the 85mm on the UNISTELLAR Odyssey gather more light and reach fainter targets, which is why those scopes cost more.
For smartphone-assisted scopes, aperture is everything. The 150mm Celestron StarSense Explorer shows dramatically more than the 114mm model on faint targets. Match the aperture to the targets you care about.
EQ Mode, Live Stacking, and Software
If you want to image faint targets from a light-polluted area, EQ mode matters. Equatorial tracking avoids the field rotation that limits alt-az exposures to about 10 seconds. The DWARFLAB Dwarf Mini, Dwarf 3, ZWO Seestar S30, and S30 Pro all support EQ mode, which is why I recommend them for serious imagers on a budget.
App quality varies more than spec sheets suggest. In my testing, the ZWO and DWARFLAB apps were the most reliable. Read recent reviews to check for firmware update quality, since these scopes improve substantially over their lifespan through software patches.
Portability and Setup Time
If you travel with your scope, weight and pack size matter. The DWARFLAB Dwarf Mini at 1.85 pounds is the only true smart scope I would pack on a long hike. The ZWO Seestar S30 and DWARFLAB Dwarf 3 are both under 4 pounds and work well for car-camping trips. The UNISTELLAR Odyssey models and the Celestron tabletop Dobsonian are better suited to backyard use.
Setup time is a major quality-of-life factor. The DWARFLAB and ZWO smart scopes are ready to image in about 2 minutes. The UNISTELLAR Odyssey is similar. Smartphone-assisted scopes take longer because you must manually point them at each target.
Light Pollution Performance
Most buyers image from suburban or urban skies, so light pollution performance is critical. Built-in dual-band or light pollution filters, found on the ZWO Seestar S30, S30 Pro, DWARFLAB Dwarf Mini, and Dwarf 3, make a real difference. I noticed cleaner backgrounds and more contrast on nebulae when using scopes with these filters compared to those without.
The Celestron StarSense scopes are not designed for deep-sky imaging from light-polluted sites. Use them for the Moon, planets, and bright clusters from a suburban backyard, and travel to darker skies for serious deep-sky work.
Smart Telescope vs Traditional Astrophotography Setup
This is the most common question I see on Reddit and Cloudy Nights. A traditional astrophotography rig with a dedicated astronomy camera, equatorial mount, guide scope, and laptop will outperform any smart telescope on faint targets. But it costs more, weighs more, and takes hours to set up and learn.
Smart telescopes trade ultimate image quality for accessibility. They are the right choice for beginners, casual imagers, travelers, and anyone who wants to actually enjoy observing rather than wrestling with gear. Many experienced astrophotographers own both: a traditional rig for serious work and a smart scope for grab-and-go nights.
FAQs
Are smart telescopes worth it?
Yes, smart telescopes are worth it if you want to capture deep-sky images without the steep learning curve of traditional astrophotography. They cost between $400 and $700 for solid models like the DWARFLAB Dwarf 3 and ZWO Seestar S30, and they produce shareable images of nebulae and galaxies from light-polluted suburban skies within minutes. They are not worth it if you want to do professional-grade imaging, view through an eyepiece (except for the UNISTELLAR Odyssey PRO), or shoot detailed planetary images.
Can you see planets with a smart telescope?
You can capture planets with a smart telescope, but the results are limited. Smart scopes use small apertures and short focal lengths optimized for wide-field deep-sky imaging, so planets appear as small discs rather than detailed globes. You will see Jupiter’s main cloud belts and Saturn’s rings, but not the fine detail a dedicated planetary camera and a long-focal-length scope can deliver. For planetary viewing, the Celestron StarSense Explorer scopes with their longer focal lengths are a better choice.
What is the most advanced smart telescope?
The UNISTELLAR Odyssey PRO is the most advanced smart telescope I tested. It pairs an 85mm aperture with the only eyepiece technology in the smart-telescope category, supports RAW and FITS data export for advanced processing, and includes participation in NASA and SETI citizen science campaigns. It also costs $4599, which reflects its premium positioning.
What is the best smart telescope for beginners?
The DWARFLAB Dwarf 3 is the best smart telescope for beginners because it pairs a true live-stacking workflow with a forgiving app, dual-camera versatility, and a price most first-time buyers can justify. If you want to spend less, the ZWO Seestar S30 offers nearly identical smart-telescope performance for $399 and is also a top pick for first-time deep-sky imagers.
What is the absolute best smart telescope?
The DWARFLAB Dwarf 3 is the absolute best smart telescope for most buyers in 2026 because it balances price, portability, image quality, and the unique dual-lens system for day and night use. For unlimited budget and visual eyepiece observing, the UNISTELLAR Odyssey PRO is the most capable option in this guide.
How does live stacking work in a smart telescope?
Live stacking works by capturing short exposures of 10 to 30 seconds and adding them together in real time inside the app. Each new frame aligns with the previous ones, building signal while averaging out random sensor noise. After a few minutes, faint deep-sky objects like nebulae and galaxies appear in color on your phone screen, even though they are invisible to the eye through the same scope from a light-polluted location.
Conclusion: My Final Recommendations for 2026
After three months of side-by-side testing, my top pick for the best smart telescope overall is the DWARFLAB Dwarf 3. Its combination of true live-stacking performance, dual-camera versatility, portability, and price makes it the model I keep reaching for first. For value buyers, the ZWO Seestar S30 delivers the same smart-telescope experience for less money and is the easiest entry point into deep-sky imaging.
If budget is no object and you want the most capable smart telescope available, the UNISTELLAR Odyssey PRO is the only scope that combines live stacking with a real eyepiece. For pure visual observers on a budget, the Celestron StarSense Explorer LT 114AZ or DX 130AZ will serve you well for years.
Whichever you choose, the best smart telescopes of 2026 have closed the gap between casual stargazing and serious astrophotography more than ever before. Pick the one that matches your sky, your targets, and your budget, and you will spend less time fighting gear and more time actually enjoying the night sky.