In the sprawling world of Anno 117 Pax Romana, where Roman ambition meets logistical complexity, few production chains are as crucial yet often misunderstood as garum production. This ancient Roman fish sauce isn’t just a luxury good—it’s the backbone of your Plebeian population’s happiness and your empire’s economic stability. Whether you’re a seasoned governor or just beginning your Roman conquest, mastering the garum production chain will separate thriving settlements from struggling outposts.
The Essential Role of Garum in Your Roman Empire
Before diving into production ratios, let’s understand why garum deserves your attention. When your Libertus residents upgrade to Plebeians, they develop sophisticated tastes that include garum among their essential needs. This fermented fish sauce was historically one of Rome’s most valuable commodities, and in Anno 117 Pax Romana, it serves as a critical stepping stone in your civilization’s progression.
Without efficient garum production, your Plebeians will remain discontent, limiting your tax revenue and stalling your advancement to higher population tiers. Moreover, garum represents one of your first opportunities to create trade surpluses, generating additional income through exports to other settlements or AI traders.
Understanding the Garum Production Chain Components
Building an efficient garum production chain requires understanding three key buildings, each with distinct placement requirements and production cycles:
Salt Ponds: The Foundation of Flavor
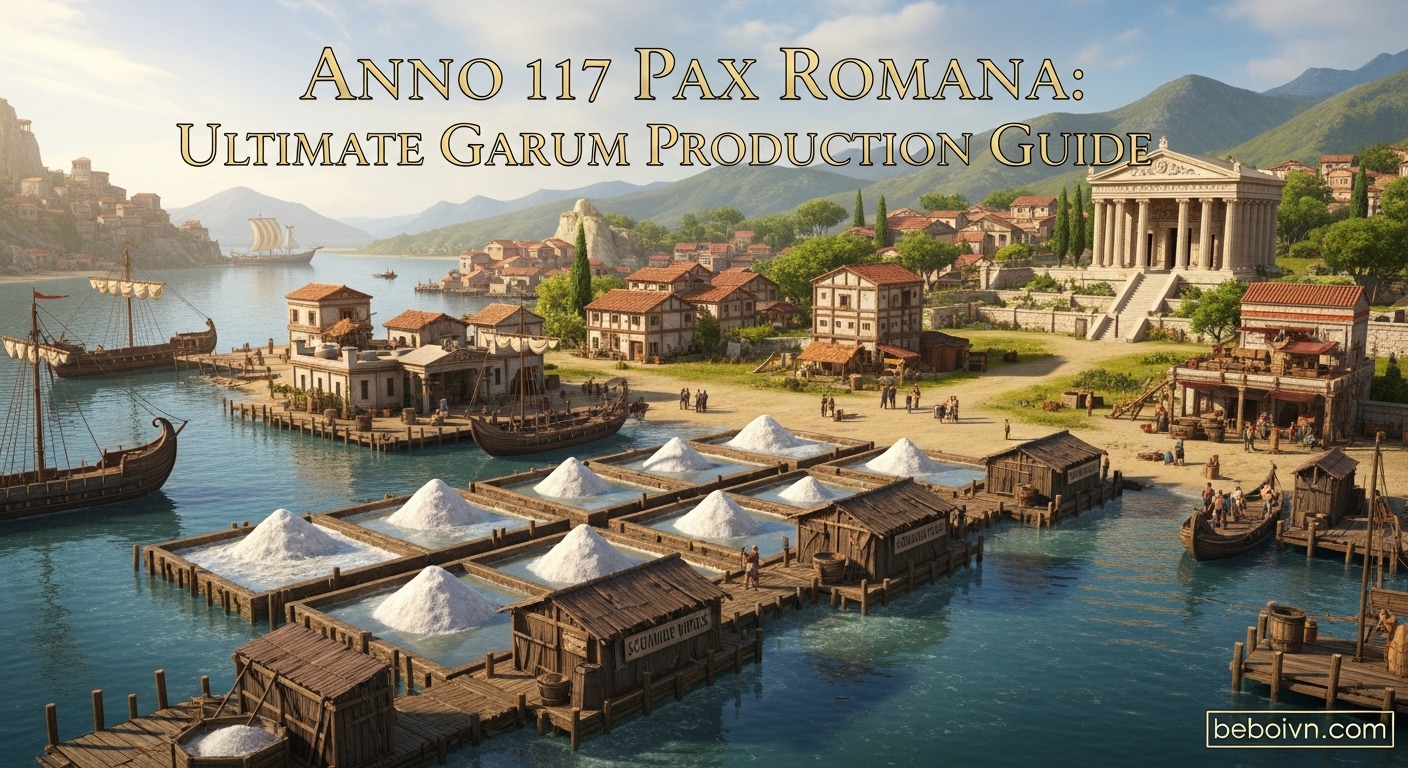
Salt ponds are your primary source of salt, a fundamental ingredient in garum production. These buildings must be placed in coastal waters and operate on a 30-second production cycle, yielding one unit of salt per cycle. The strategic placement of salt ponds is crucial—they should be positioned in deep water areas with minimal obstacles to maximize efficiency.
Pro Tip: Salt ponds benefit from being clustered together, as this reduces the distance your workers need to travel and minimizes road maintenance costs. Consider placing them in a dedicated coastal zone separate from your main settlement to keep your production organized.
Scomber’s Shacks: Harvesting the Sea’s Bounty
Scomber’s shacks are responsible for catching mackerel, the second essential ingredient in garum. Like salt ponds, these structures require coastal placement but operate on a longer 60-second production cycle. This timing difference is precisely why the optimal ratio isn’t 1:1 with salt ponds.
Advanced Strategy: Scomber’s shacks have a larger area of influence than salt ponds. Position them to maximize overlap with rich fishing grounds while maintaining access to road networks. Some players prefer to place them slightly deeper than salt ponds, as mackerel often spawn in deeper waters.
Garum Works: Where Magic Happens
The garum works is where salt and mackerel combine to create the finished product. This land-based building operates on a 90-second production cycle and requires both ingredients to function. The garum works represents the final step in your production chain and should be centrally located to minimize transportation time from both salt ponds and scomber’s shacks.
Layout Optimization: Place garum works near your Plebeian residential areas to benefit from area effects that can boost production efficiency. Some buildings provide bonuses when placed near production facilities, so always check for potential synergies before finalizing your layout.
The Perfect Garum Production Ratio: Mathematics Meets Strategy
After extensive testing and community validation, the optimal garum production ratio in Anno 117 Pax Romana is:
1 Salt Pond : 2 Scomber’s Shacks : 3 Garum Works
This ratio isn’t arbitrary—it’s mathematically derived from the production cycles of each building:
- Salt Pond: 30 seconds per unit = 2 units per minute
- Scomber’s Shack: 60 seconds per unit = 1 unit per minute
- Garum Works: 90 seconds per unit = 0.67 units per minute
With one salt pond producing 2 units of salt per minute and two scomber’s shacks producing 2 units of mackerel per minute, you have exactly enough raw materials for three garum works to produce 2 units of garum per minute (3 × 0.67 = 2.01, which the game rounds to 2).
Beyond the Basics: Advanced Garum Production Strategies
While the basic ratio gets you started, true mastery of garum production involves several advanced considerations that can dramatically improve your efficiency and profitability.
Scaling for Growth: Modular Production Design
As your empire expands, you’ll need to scale your garum production accordingly. Instead of continuously adding individual buildings, consider implementing a modular approach:
Base Module: 1 Salt Pond + 2 Scomber’s Shacks + 3 Garum Works
This module produces 2 garum per minute and serves approximately 100-120 Plebeians. When you need to expand, simply add another complete module rather than calculating individual building additions. This approach maintains perfect efficiency while simplifying expansion planning.
Transportation Logistics: The Hidden Efficiency Factor
Many players focus solely on production ratios while neglecting transportation logistics, which can significantly impact your actual output. Consider these transportation optimization strategies:
- Dedicated Production Roads: Create separate road networks for your production chains to prevent worker congestion. Garum production workers shouldn’t compete with timber or food production workers for road space.
- Warehouse Strategic Placement: Position warehouses between your coastal production buildings and inland garum works. This creates buffer stock and reduces the distance workers need to travel for raw materials.
- Dock Integration: If producing garum for export, place garum works near docks to minimize the distance finished goods must travel. Every tile saved in transportation time improves your overall efficiency.
Specialization vs. Self-Sufficiency: The Island Dilemma
One of the most strategic decisions you’ll face is whether to specialize entire islands in garum production or maintain self-sufficient settlements on each island. Each approach has distinct advantages:
Specialization Benefits:
- Maximizes production efficiency through focused infrastructure
- Simplifies logistics and worker management
- Creates clear trade opportunities between islands
- Allows for specialized research and god bonuses
Self-Sufficiency Benefits:
- Reduces vulnerability to supply chain disruptions
- Minimizes transportation costs and complexity
- Provides redundancy in case of island-specific disasters
- Simplifies early-game management
Expert Recommendation: Start with self-sufficient production on your main island, then transition to specialized garum production islands as your empire grows. This approach balances early-game simplicity with late-game efficiency.
Economic Optimization: Turning Garum into Gold
Efficient production is only half the battle—maximizing your economic return from garum production requires strategic market management and trade optimization.
Understanding Market Dynamics
Garum’s value fluctuates based on supply and demand across your empire. Monitor these key indicators:
- Local Demand: Track how many Plebeians need garum versus your production capacity. A surplus indicates export opportunities.
- Regional Prices: Different AI traders and islands may offer varying prices for garum. Always compare prices before establishing trade routes.
- Production Costs: Calculate your actual production costs including worker wages, building maintenance, and transportation to determine your minimum profitable selling price.
Trade Route Optimization
When exporting surplus garum, consider these trade route strategies:
- Direct Trade Routes: Establish direct ship routes between your production island and the highest-paying buyer. This maximizes profit per unit but may leave ships underutilized.
- Circular Trade Routes: Create routes that visit multiple trading partners, selling garum wherever the price is highest. This maximizes ship utilization but requires more complex management.
- Automated Trading: Set up automated trade routes that only trigger when garum production exceeds local demand. This ensures your citizens’ needs are always met before exporting.
Divine Intervention: Leveraging Gods for Garum Production
Anno 117 Pax Romana’s religious system offers powerful bonuses that can dramatically improve your garum production efficiency. Choosing the right patron god and implementing their blessings strategically can give you a significant competitive edge.
Best Gods for Garum Production
While several gods offer production bonuses, these are particularly effective for garum production chains:
Saras, Goddess of Agriculture: While primarily focused on farming, Saras’s blessings can extend to coastal production buildings through certain research paths. Her “Bountiful Harvest” blessing can increase production speed by up to 15% for all resource-gathering buildings.
Neptune, God of the Sea: As the ruler of oceans and fisheries, Neptune offers direct bonuses to coastal production buildings. His “Favorable Tides” blessing reduces production time for both salt ponds and scomber’s shacks by 20%.
Mercury, God of Commerce: Mercury’s blessings don’t directly increase production but improve the economic aspects of garum production. His “Prosperous Trade” blessing increases the selling price of goods by 25%, making your garum exports significantly more profitable.
Implementing Divine Blessings
To maximize the benefits of divine favor:
- Build Temples Early: Construct temples to your chosen patron gods as soon as possible. The earlier you start accumulating favor, the sooner you can access powerful blessings.
- Time Blessings Strategically: Activate production speed blessings during periods of high demand or when expanding your production capacity. Use economic blessings when you have large surpluses to export.
- Combine Blessings: Some advanced research allows you to maintain multiple active blessings. Combine production speed increases with economic bonuses for maximum effect.
Common Pitfalls and How to Avoid Them
Even experienced players can fall into traps that undermine their garum production efficiency. Learn from these common mistakes:
The Expansion Trap
Many players expand their garum production too quickly, building additional garum works before ensuring adequate raw material supply. This leads to idle buildings and wasted maintenance costs.
Solution: Always expand production in complete modules (1 Salt Pond + 2 Scomber’s Shacks + 3 Garum Works) to maintain perfect ratios.
The Placement Penalty
Placing production buildings too far from raw materials or residential areas creates inefficiencies that compound over time. Workers spend more time traveling than producing.
Solution: Plan your production zones carefully, using warehouses as buffer stock and minimizing transportation distances. Use the building overlay tools to visualize worker travel paths.
The Market Misstep
Selling garum too early or at too low a price represents lost profit potential. Conversely, hoarding garum when you could be earning income from exports is equally inefficient.
Solution: Establish clear thresholds for export. Only sell garum when you have at least 10% surplus beyond local needs, and always compare prices across multiple trading partners.
Advanced Layout Strategies for Maximum Efficiency
For players looking to optimize every aspect of their garum production, these advanced layout strategies can provide additional efficiency gains:
The Coastal Production Cluster
This layout concentrates all garum production buildings in a dedicated coastal zone:
- Outer Ring: Salt ponds positioned in deep water for maximum efficiency
- Middle Ring: Scomber’s shacks in slightly shallower water
- Inner Zone: Garum works on land, connected via dedicated roads
- Central Hub: Warehouse and market buildings for distribution
Benefits: Minimizes worker travel distance, simplifies expansion, and creates a visually organized production zone.
The Integrated Residential-Production Model
This approach integrates garum production with Plebeian housing:
- Place garum works near Plebeian residences to benefit from area effects
- Position salt ponds and scomber’s shacks just offshore, connected by efficient road networks
- Use the increased tax revenue from happy Plebeians to fund further expansion
Benefits: Maximizes area effect bonuses, reduces transportation costs for finished goods, and creates a self-sustaining economic zone.
The Multi-Island Production Network
For advanced players with multiple islands:
- Primary Island: Focus on salt and mackerel production, leveraging the best coastal locations
- Secondary Island: House garum works and Plebeian populations, benefiting from area effects
- Transport Network: Automated ships moving raw materials and finished goods between islands
Benefits: Maximizes specialized production efficiency, creates natural trade opportunities, and provides redundancy in case of island-specific issues.
Conclusion: Mastering Garum for Roman Dominance
Building an efficient garum production chain in Anno 117 Pax Romana is more than just following a ratio—it’s about understanding the intricate dance between production timing, logistics, economics, and urban planning. The perfect 1:2:3 ratio of Salt Ponds to Scomber’s Shacks to Garum Works provides the foundation, but true mastery comes from optimizing every aspect of this crucial production chain.
Remember that garum production isn’t an end in itself—it’s a means to advance your civilization, generate wealth, and unlock new opportunities. As you implement these strategies, continuously monitor your efficiency, adapt to changing conditions, and never stop optimizing. The most successful Roman governors in Anno 117 Pax Romana are those who treat every production chain as both a science and an art.
By following the guidelines in this comprehensive guide, you’ll not only meet your Plebeians’ garum needs but create a production powerhouse that fuels your empire’s expansion and prosperity. Now go forth and build the most efficient garum production chain the Roman world has ever seen.