The Armored Transports quest in ARC Raiders stands as one of the most challenging yet rewarding missions in the game’s current quest lineup. This late-game quest tasks players with navigating the dangerous Checkpoint area of The Blue Gate map to locate a Patrol Car Key, then using it to access armored vehicles hidden within the underground traffic tunnels. While the quest objectives sound straightforward, the reality involves navigating through some of the most heavily patrolled areas in the game, making proper preparation and knowledge essential for success.
This comprehensive guide will walk you through every step of the Armored Transports quest, from locating the elusive Patrol Car Key to finding and unlocking the armored patrol vehicles. We’ll cover optimal loadouts, detailed spawn locations, enemy avoidance strategies, and what rewards await you upon completion. Whether you’re attempting this quest solo or with a squad, this guide will provide you with all the information needed to complete it efficiently and safely.
Quest Overview and Preparation
The Armored Transports quest is given by Tian Wen, one of the traders at Speranza, and represents one of the final quests in the current game cycle. The quest consists of several key objectives that must be completed in sequence:
- Reach the Checkpoint area on The Blue Gate map
- Search the Guard huts for an Armored Patrol Key Card
- Reach the Traffic Tunnel near the Blue Gate Checkpoint
- Find and unlock the rear door of an armored patrol car
Before embarking on this quest, proper preparation is crucial. The Checkpoint area and underground tunnels are among the most dangerous locations in The Blue Gate, frequently patrolled by high-level ARC enemies including Bastions, Rocketeers, Bombardiers, and swarms of Wasps and Hornets. Additionally, this area is a hotspot for other raiders, increasing the risk of PvP encounters.
Recommended Loadout
For the Armored Transports quest, we recommend bringing:
- Shield: A high-tier shield with good durability is essential for surviving unexpected encounters
- Weapon: Choose a weapon you’re comfortable with that has good crowd-control capabilities
- Utility Items: At least 2-3 Noisemakers for distracting ARC enemies
- Stealth Options: Smoke grenades or a cloaking device if available
- Safe Pocket: Crucially, avoid using a free loadout or ensure you have a safe pocket to store the Patrol Car Key
Pro Tip: Many players report that this quest can become bugged if you die while carrying the Patrol Car Key. The key may not respawn reliably, forcing you to search random containers across Blue Gate for a replacement. Always store the key in your safe pocket immediately after finding it!
Locating the Patrol Car Key: Checkpoint Area Guide
The first major challenge of the Armored Transports quest is locating the Patrol Car Key within the Checkpoint area. This central region of The Blue Gate map is heavily fortified and constantly patrolled, making stealth and careful navigation essential.
Checkpoint Area Navigation
The Checkpoint is located at the center of The Blue Gate map, marked by several guard booths positioned across a main road. When approaching this area, we recommend:
- Approach from the east or west: These directions typically offer better cover and fewer sightlines for ARC enemies
- Use high ground: The elevated terrain around the Checkpoint provides better visibility and tactical advantages
- Time your approach: Observe enemy patrol patterns and move during gaps in their routes
- Have an escape route: Always know where you can retreat to if things go wrong
Guard Hut Search Strategy
The Patrol Car Key spawns on a desk inside one of the guard huts, typically found in a pile of papers or files. Based on extensive player reports and our own testing, the key most commonly appears in:
- Far-left guard hut: This is the most frequent spawn location (approximately 60% of the time)
- Middle guard huts: Less common but still possible spawn points
- Far-right guard hut: Least common but still viable location
Search Method:
- Approach each guard hut cautiously, checking for enemies inside
- Look for desks with papers or files scattered on them
- Interact with the documents when prompted to search for the key
- Once found, immediately transfer the key to your safe pocket
Pro Tip: The guard huts are small, so you can quickly check each one by peeking through windows or doors before fully entering. This minimizes your exposure to enemy patrols.
Traffic Tunnel Navigation and Armored Car Locations
With the Patrol Car Key secured, the next phase of the Armored Transports quest takes you into the underground traffic tunnels north of the Checkpoint area. This section is arguably the most dangerous part of the quest, featuring tight corridors, limited escape routes, and high concentrations of powerful enemies.
Reaching the Traffic Tunnel
To access the underground traffic tunnels:
- Head north from the Checkpoint: Move toward the large tunnel entrance marked “Outer Gates”
- Use distractions: Throw a Noisemaker away from your intended path to draw ARC enemies away from the entrance
- Move quickly but carefully: The tunnel entrance is often guarded by at least one Bastion or Rocketeer
- Be prepared for ambushes: Wasps and Hornets frequently patrol the tunnel entrance areas
Armored Patrol Car Spawn Locations
Armored patrol cars can spawn in several locations within the traffic tunnel system. Based on our research and player reports, here are the most common spawn points:
Primary Spawn Locations:
- Right side of tunnel entrance: Near the hanging road signs, relatively safe compared to other locations
- Through armored door on right: Just past the first location, accessible through a security door
- Halfway into tunnel: On the right side next to a low barricade
- Roundabout area: On the left side where the tunnel opens up into a larger chamber
- Back of tunnel: Against the right-hand wall near the tunnel’s end, sometimes with two spawns here
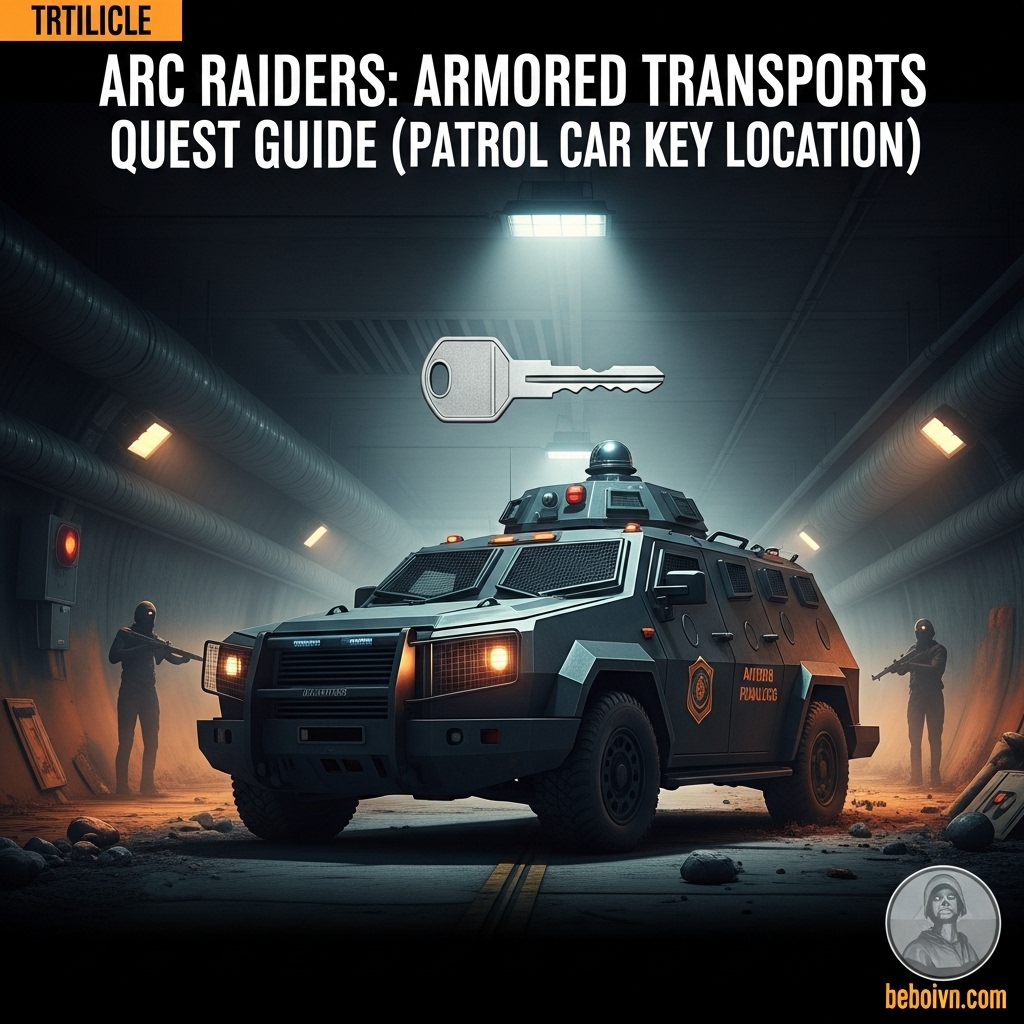
Identifying Armored Patrol Cars:
- Look for bulky, military-green vehicles resembling armored vans
- Check for the word “MANTIKOR” written on the side
- Unopened vehicles will have a closed rear door with a light shining on it
- Previously looted vehicles will have open or missing rear doors
Pro Tip: The armored cars are often guarded by Bastions, which can quickly destroy unprepared players. Always scout the area before approaching and consider using smoke grenades for cover while you unlock and loot the vehicle.
Advanced Strategies and Enemy Avoidance
Successfully completing the Armored Transports quest requires more than just knowing locations—it demands smart tactics and strategic thinking. Here are some advanced strategies to increase your chances of success.
Enemy Management Techniques
Dealing with Bastions:
- Bastions are heavily armored and deal massive damage
- Use hit-and-run tactics rather than direct confrontation
- Aim for weak points if you must engage them
- Consider using explosive weapons for maximum effectiveness
Handling Swarms (Wasps/Hornets):
- These fast-moving enemies can overwhelm you quickly
- Area-of-effect weapons work best against groups
- Use environmental obstacles to funnel them into kill zones
- Don’t waste ammunition on individual stragglers unless necessary
Avoiding Rocketeers:
- Their explosive attacks can end your run instantly
- Keep moving and use cover effectively
- Listen for their distinctive sound cues
- Engage at range if possible, using precision weapons
Stealth Approaches
Solo Play Strategy:
- Move during ARC patrol cycles
- Use natural cover and shadows to remain hidden
- Save Noisemakers for emergency distractions
- Consider cloaking devices if available
Team Coordination:
- Designate roles (scout, support, damage dealer)
- Use voice communication for coordinated movements
- Create diversions to draw enemy attention
- Cover multiple angles simultaneously
Pro Tip: The Traffic Tunnel area has multiple levels and side passages. Use these to your advantage for flanking enemies or escaping dangerous situations. The verticality of the area can be a tactical advantage if used correctly.
Quest Rewards and Post-Completion Tips
Completing the Armored Transports quest provides valuable rewards that make the challenging journey worthwhile. Understanding these rewards and how to best utilize them will help you maximize the benefits of your efforts.
Quest Completion Rewards
Upon successfully looting an armored patrol car and extracting from The Blue Gate, you’ll receive:
- Blue Yellow Aviator Outfit Color: A cosmetic item that changes your aviator outfit color scheme
- 3x Smoke Grenades: Useful utility items for future missions
- 3x Defibrillators: Essential healing items for reviving yourself or teammates
These rewards are particularly valuable for players focusing on stealth and survival gameplay, as smoke grenades and defibrillators are among the most useful consumables in the game.
Additional Loot Opportunities
Beyond the quest rewards, the armored patrol cars contain valuable loot that shouldn’t be overlooked:
- Weapon Case: Guaranteed to contain at least one weapon, often of rare or higher quality
- Additional Containers: Sometimes include crafting materials, ammunition, or other valuable items
- Cosmetic Items: Chance to find unique cosmetic items in some vehicles
Pro Tip: Even after completing the Armored Transports quest, it’s worth returning to the Traffic Tunnel area whenever you find additional Patrol Car Keys. The weapon cases in these vehicles provide some of the best consistent loot in The Blue Gate area.
Common Issues and Troubleshooting
The Armored Transports quest, while straightforward in concept, can present several challenges and potential issues. Being aware of these problems and knowing how to address them can save you significant frustration.
Patrol Car Key Despawn Issues
Problem: The Patrol Car Key doesn’t respawn in the guard huts after you die or extract.
Solution:
- Check random containers across Blue Gate, particularly in Village area and raider camps
- Look in lockers, other vehicles, and storage containers
- Some players report finding replacement keys in the Ancient Fort area
- If all else fails, wait for server reset or try again in a new session
Prevention: Always store the key in your safe pocket immediately after finding it. This prevents losing it if you die during the mission.
Armored Car Already Looted
Problem: All armored patrol cars in the area have already been opened by other players.
Solution:
- Extract with the Patrol Car Key and return in a new session
- Different sessions may have different spawn states for the vehicles
- Try visiting during off-peak hours when fewer players are active
Quest Not Completing
Problem: After looting the armored car, the quest doesn’t mark as complete.
Solution:
- Ensure you’ve actually interacted with and looted the weapon case inside
- Try extracting and returning to Speranza to turn in the quest
- If the issue persists, it may be a bug that requires developer attention
Pro Tip: The Armored Transports quest is known to have some bugs in the current version of the game. Always report persistent issues to the developers and check for patches that may address these problems.
Conclusion: Mastering the Armored Transports Quest
The Armored Transports quest in ARC Raiders represents one of the most challenging and rewarding experiences currently available in the game. Successfully navigating the dangerous Checkpoint area, locating the elusive Patrol Car Key, and unlocking the armored vehicles requires skill, preparation, and patience. However, the rewards—both in terms of quest completion and valuable loot—make this journey worthwhile for dedicated players.
Throughout this guide, we’ve covered every aspect of the Armored Transports quest, from initial preparation to final extraction. We’ve detailed the exact locations where you can find the Patrol Car Key, provided comprehensive spawn information for the armored patrol cars, and shared advanced strategies for dealing with the dangerous enemies that inhabit these areas. We’ve also addressed common issues and provided troubleshooting tips to help you overcome any obstacles you might encounter.
Remember that the key to success in this quest lies in proper preparation, careful navigation, and smart decision-making. Always store the Patrol Car Key in your safe pocket, use distractions wisely, and don’t hesitate to extract and try again if the situation becomes too dangerous. The Traffic Tunnel area will still be there on your next attempt, and sometimes discretion truly is the better part of valor.
As you continue your journey through ARC Raiders, the skills and knowledge gained from completing the Armored Transports quest will serve you well in other challenging missions throughout the game. The experience of navigating high-danger areas, managing limited resources, and making tactical decisions under pressure are all valuable skills that will enhance your overall gameplay experience.
Whether you’re a solo player looking to test your skills or part of a coordinated squad seeking the best loot available, the Armored Transports quest offers a compelling challenge that showcases the best of what ARC Raiders has to offer. With this guide as your companion, you’re well-equipped to tackle this quest and claim the rewards that await within those armored vehicles deep beneath The Blue Gate.