Battlefield 6 Season 1 has completely reshaped the competitive landscape, bringing weapon balance changes, new attachments, and refined mechanics that demand fresh strategies. Whether you’re grinding ranks in Conquest, dominating in Breakthrough, or climbing the competitive ladder, having the right loadout can mean the difference between victory and defeat. This comprehensive guide breaks down the absolute best meta loadouts for Season 1, combining data-driven analysis with practical battlefield experience to give you the edge you need.
Understanding Battlefield 6’s Season 1 Meta Shifts
Before diving into specific loadouts, it’s crucial to understand how Season 1 has fundamentally changed Battlefield 6’s weapon dynamics. EA’s developers implemented significant weapon dispersion adjustments, addressing long-standing community feedback about inconsistent accuracy. The changes ensure each weapon performs more reliably within its intended range bracket, making weapon choice and attachment optimization more important than ever.
The Season 1 update also fixed critical bugs affecting post-sprint firing accuracy and movement-based dispersion increases. These fixes mean weapons now behave more predictably, allowing skilled players to push their engagement ranges with confidence. Additionally, the close-range TTK adjustments in Battlefield RedSec (the battle royale mode) have influenced weapon popularity across all game modes, creating a more unified meta hierarchy.
The Pick 100 Economy: Building Smart Loadouts
Battlefield 6’s attachment system operates on a 100-point budget that forces meaningful trade-offs. You can’t simply stack every beneficial attachment—you must prioritize what matters most for your playstyle and the weapon’s role. This system rewards specialized builds over jack-of-all-trades setups, encouraging players to commit to specific engagement ranges and tactical approaches.
When building your loadouts, consider these core principles:
- Specialization over versatility: Trying to make a weapon effective at all ranges results in mediocrity everywhere
- High-impact attachments first: Expensive attachments (25-30 points) should define your build’s identity
- Balance strengths and weaknesses: Every advantage comes with a trade-off—accept your weapon’s limitations
Top-Tier Assault Rifle Loadouts
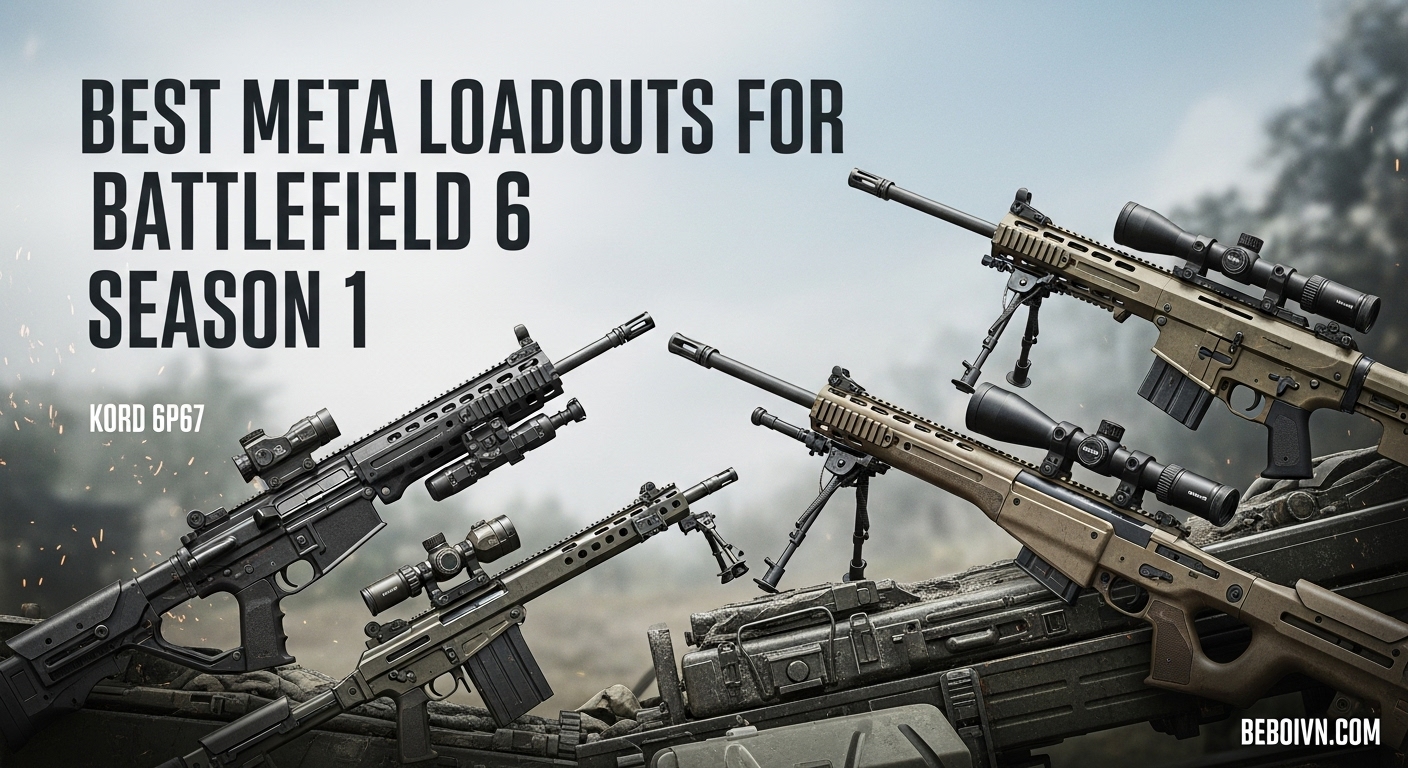
KORD 6P67: The Unquestioned King
The KORD 6P67 stands as Season 1’s premier assault rifle, offering devastating damage output with manageable recoil patterns. Its three-shot kill potential up to 40 meters makes it incredibly forgiving, while its attachment flexibility allows for multiple viable builds depending on your preferred engagement range.
Optimal Mid-Range Build:
- Muzzle: Lightened Suppressor (30 pts)
- Barrel: 415mm Prototype Heavy (10 pts)
- Underbarrel: Ribbed Vertical (20 pts)
- Magazine: 30RND Fast Mag (10 pts)
- Ammunition: Hollow Point (20 pts)
- Scope: RO-M 1.75x (10 pts)
This configuration maximizes the KORD’s strength at 30-50 meter engagements, where it truly shines. The Lightened Suppressor keeps you off radar while the Ribbed Vertical grip and Heavy Barrel combination provides laser-like accuracy for follow-up shots. Hollow Point ammunition ensures those crucial three-shot kills, while the 1.75x scope gives you the precision advantage in mid-range duels.
Why this works: The KORD’s base damage profile means you only need three shots to secure kills within its effective range. This build minimizes recoil to ensure all three shots hit their mark, while the suppressor prevents you from revealing your position during aggressive plays.
NVO-228E: The Versatile Contender
For players who prefer a more mobile playstyle, the NVO-228E offers an excellent alternative with its faster handling and superior mobility stats. While it doesn’t pack quite the same punch as the KORD, its versatility makes it perfect for players who frequently shift between close and mid-range engagements.
Mobile Aggressor Build:
- Muzzle: Compensated Brake (30 pts)
- Barrel: 409mm Fluted (25 pts)
- Underbarrel: Classic Vertical (20 pts)
- Magazine: 40RND Magazine (15 pts)
- Ammunition: Polymer Case (5 pts)
- Scope: OSA-7 1.00x (5 pts)
This setup prioritizes mobility and sustained fire, making it perfect for objective-based play where you need to maintain pressure while capturing points. The extended magazine gives you the edge in multi-target engagements, while Polymer Case ammunition keeps your movement speed penalty minimal when aiming down sights.
Dominant SMG Configurations
SGX: The Close-Range Monster
The SGX has emerged as Season 1’s top SMG, boasting an impressive 950 RPM fire rate with surprisingly manageable recoil. Its blistering time-to-kill in close quarters makes it the go-to choice for aggressive players who excel in tight spaces and close-quarters combat.
Room Clearing Specialist:
- Muzzle: Linear Compensator (15 pts)
- Barrel: 180mm Standard (10 pts)
- Underbarrel: 6H64 Vertical (25 pts)
- Magazine: 40RND Magazine (20 pts)
- Ammunition: Soft Point (20 pts)
- Laser: 5 MW Green (10 pts)
This configuration transforms the SGX into a laser beam, allowing you to challenge assault rifles at surprising ranges while maintaining its close-quarters dominance. The Linear Compensator and 6H64 Vertical grip combination virtually eliminates horizontal recoil, making burst firing at medium distances surprisingly effective.
SCW-10: The High-Risk, High-Reward Option
For players with exceptional aim and trigger discipline, the SCW-10 offers the fastest raw TTK in its class. With a blistering fire rate and excellent damage per bullet, it can shred enemies before they have time to react—provided you can manage its limited magazine capacity and significant recoil.
Precision Burst Build:
- Muzzle: CQB Suppressor (30 pts)
- Barrel: 200mm Custom Extended (15 pts)
- Underbarrel: Folding Vertical (10 pts)
- Magazine: 20 Round Magazine (20 pts)
- Ammunition: Standard FMJ (5 pts)
- Laser: 5 MW Green Laser (10 pts)
- Scope: Mini Flex 1.00x (10 pts)
This build requires precise aim control but rewards skilled players with unmatched killing speed. The Custom Extended barrel helps extend its effective range, while the Folding Vertical grip provides just enough recoil control to make rapid follow-up shots possible. The small magazine means you’ll need to make every shot count, but the suppressor ensures you can do so without revealing your position.
LMG Meta Loadouts for Area Control
DRS-IAR: The Ultimate Support Weapon
The DRS-IAR has claimed the top spot among LMGs in Season 1, offering an excellent balance of firepower, accuracy, and mobility. Its large magazine capacity and manageable recoil pattern make it perfect for locking down sightlines and suppressing enemy movements.
Defensive Position Build:
- Muzzle: Lightened Suppressor (30 pts)
- Barrel: 20” SDM-R Heavy Ext. (10 pts)
- Underbarrel: Alloy Vertical (20 pts)
- Magazine: 40RND Magazine (25 pts)
- Ammunition: Standard FMJ (5 pts)
- Scope: RO-M 1.75x (10 pts)
This configuration maximizes the DRS-IAR’s strengths as a defensive weapon, allowing you to control key areas of the map with sustained, accurate fire. The Heavy Extended barrel and Alloy Vertical grip combination provides exceptional stability for long-range engagements, while the suppressor keeps you hidden while you’re holding down positions.
KTS100 MK8: The Long-Range Specialist
For players who prefer to engage from extreme distances, the KTS100 MK8 offers unparalleled accuracy and damage at range. While it sacrifices some mobility, its ability to consistently land shots at 70+ meters makes it invaluable for large-scale maps and defensive play.
Marksman LMG Build:
- Muzzle: Lightened Suppressor (30 pts)
- Barrel: 508mm MK8 Heavy Ext. (10 pts)
- Underbarrel: 6H64 Vertical (25 pts)
- Magazine: 60RND Drum Mag (5 pts)
- Ammunition: Hollow Point (20 pts)
- Scope: SDO 3.50x (10 pts)
This build turns the KTS100 MK8 into a pseudo-DMR, capable of precision fire at ranges where most other weapons become ineffective. The Heavy Extended barrel maximizes bullet velocity and accuracy, while the high-power scope allows you to engage distant targets with confidence. The drum magazine ensures you can maintain pressure without frequent reloads.
Sniper and DMR Loadouts
Mini Scout: The Aggressive Sniper’s Choice
As Season 1’s standout new weapon, the Mini Scout has quickly become the preferred sniper rifle for aggressive players who value mobility and quick target acquisition. Its ability to rechamber while aiming down sights—unique among sniper rifles—gives it a significant advantage in dynamic engagements.
Quick Scope Build:
- Muzzle: Lightened Suppressor (30 pts)
- Barrel: 28” Match Grade (15 pts)
- Underbarrel: Bipod (15 pts)
- Magazine: 5 Round Magazine (10 pts)
- Ammunition: High Velocity (20 pts)
- Scope: SDO 3.50x (10 pts)
This configuration emphasizes the Mini Scout’s strengths as a mobile sniper platform, allowing for quick scope shots and rapid repositioning. The High Velocity ammunition ensures your shots reach distant targets quickly, while the Match Grade barrel provides the accuracy needed for consistent one-shot headshots.
M2010 ESR: The Traditional Powerhouse
For players who prefer a more traditional sniping experience, the M2010 ESR remains the top choice in Season 1. Its exceptional muzzle velocity and damage make it incredibly forgiving, while its attachment options allow for customization to various playstyles.
Long-Distance Dominator:
- Muzzle: Tactical Suppressor (25 pts)
- Barrel: 30” Heavy Match (20 pts)
- Underbarrel: Bipod (15 pts)
- Magazine: 7 Round Magazine (10 pts)
- Ammunition: High Velocity (20 pts)
- Scope: SDO 5.50x (10 pts)
This build maximizes the M2010 ESR’s range and accuracy, making it perfect for players who enjoy setting up in overwatch positions and controlling large areas of the map. The Heavy Match barrel and High Velocity ammunition combination ensures minimal bullet drop and travel time, making long-distance shots significantly easier to land.
Class-Specific Loadout Strategies
Assault Class: Dual Primary Dominance
The Assault class’s unique ability to carry two primary weapons makes it incredibly versatile in Season 1. The most effective strategy is to pair weapons that complement each other’s range profiles, creating a loadout that’s effective in virtually any situation.
Recommended Dual Setup:
- Primary: M4A1 Carbine (close-mid range)
- Secondary: M87A1 Shotgun (room clearing)
- Gadgets: Adrenaline Injector, Deploy Beacon
- Throwable: Frag Grenade
This combination gives you the flexibility to engage effectively at all ranges. Use the M4A1 for approach and mid-range fighting, then switch to the shotgun when breaching buildings or clearing tight spaces. The Adrenaline Injector provides crucial survivability during aggressive pushes, while the Deploy Beacon allows your squad to maintain pressure on objectives.
Engineer Class: Anti-Vehicle Specialist
Engineers remain essential in Season 1, especially on vehicle-heavy maps where their anti-armor capabilities can turn the tide of battle. The key is balancing anti-vehicle effectiveness with infantry combat capability.
Anti-Armor Build:
- Primary: PW7A2 SMG
- Gadgets: RPG-7V2, Anti-Vehicle Mines
- Throwable: Anti-Vehicle Grenade
- Path: Anti-Armor
The PW7A2’s excellent hip-fire and manageable recoil make it perfect for Engineers who need to quickly switch between engaging infantry and vehicles. The Anti-Armor path provides extra rockets and faster launcher reloads, ensuring you’re never caught without anti-vehicle capability when needed.
Support Class: The Squad’s Lifeline
Support players are the backbone of any successful squad in Season 1, providing infinite health and ammunition through their Supply Bag. The best Support loadouts focus on survivability and team utility rather than pure killing power.
Combat Medic Build:
- Primary: M433 Assault Rifle
- Gadgets: Defibrillator, Deployable Cover
- Throwable: Smoke Grenades
- Path: Combat Medic
This setup prioritizes keeping your squad alive and fighting. The M433 is a reliable, well-rounded weapon that allows you to focus on positioning and support rather than weapon mastery. Deployable Cover creates safe revive spots, while Smoke Grenades provide concealment for revives in open areas.
Recon Class: Intelligence Warfare
Modern Recon play is about more than just long-range headshots—it’s about controlling information flow on the battlefield. The best Recon loadouts combine surveillance capabilities with flexible weapon options.
Intelligence Specialist:
- Primary: Mini Scout (aggressive sniper)
- Gadgets: Motion Sensor, Recon Drone
- Throwable: Incendiary Grenade
- Path: Targeting Specialist
This loadout maximizes your intelligence-gathering capabilities while maintaining combat effectiveness. The Motion Sensor and Recon Drone provide constant battlefield awareness, while the Mini Scout allows you to capitalize on that information with quick, precise eliminations.
Attachment Optimization Principles
Understanding attachment synergy is crucial for building effective loadouts in Battlefield 6 Season 1. Here are the key principles to keep in mind:
Muzzle Devices: The Foundation of Your Build
Muzzle attachments typically cost 25-30 points, making them the most expensive part of your loadout. Choose wisely based on your primary goal:
- Suppressors: Essential for stealthy play but reduce muzzle velocity
- Compensators: Best for recoil control at the cost of some muzzle velocity
- Brakes: Ideal for vertical recoil reduction
Barrel Selection: Defining Your Range
Barrels determine your weapon’s effective range and recoil characteristics. Match your barrel choice to your intended engagement distance:
- Heavy/Extended barrels: Maximize range and accuracy but reduce handling
- Standard barrels: Provide balanced performance
- Short barrels: Improve handling at the cost of range and accuracy
Underbarrel Grips: Recoil Management
Underbarrel grips are crucial for controlling recoil patterns. Different grips excel at different aspects of recoil control:
- Vertical grips: Best for controlling vertical recoil
- Angled grips: Improve aiming speed
- Bipods: Provide maximum stability when prone
Season 1 Meta FAQs
What’s the overall best weapon in Battlefield 6 Season 1?
The KORD 6P67 assault rifle currently holds the top spot due to its excellent damage profile, manageable recoil, and attachment flexibility. It’s effective in virtually all engagement ranges and excels in the hands of players of all skill levels.
Which class is strongest in Season 1?
Support class has emerged as arguably the strongest in coordinated play due to its ability to provide infinite health and ammunition to the squad. A good Support player can keep a squad fighting indefinitely, making them invaluable in objective-based modes.
How important is the Pick 100 system really?
The Pick 100 system is fundamental to Battlefield 6’s weapon balance. It prevents “god-tier” builds that dominate at all ranges and forces meaningful strategic decisions about weapon specialization. Understanding how to allocate your 100 points effectively is crucial for competitive success.
What’s the best loadout for beginners?
New players should start with the SGX SMG or M4A1 Carbine, as both have forgiving recoil patterns and excellent versatility. Pair them with the Support class and Combat Medic path to contribute meaningfully to your team while learning the game’s mechanics.
How often does the meta change in Battlefield 6?
Based on Season 1’s updates, EA appears committed to regular balance adjustments, with significant changes likely at the start of each new season. Minor hotfixes may address particularly overperforming or underperforming weapons between major updates.
Conclusion: Mastering the Season 1 Meta
Success in Battlefield 6 Season 1 comes from understanding both the weapon statistics and your own playstyle preferences. The loadouts outlined in this guide represent the current meta based on extensive testing and competitive analysis, but the best loadout is ultimately the one that feels right for you.
Experiment with different combinations, pay attention to how each attachment affects weapon performance, and don’t be afraid to deviate from the “optimal” builds if something else works better for your playstyle. The most dangerous players aren’t necessarily those using the “best” weapons—they’re the ones who have mastered their chosen loadout and understand its strengths and limitations.
As Season 1 progresses, stay tuned to patch notes and community discussions to stay ahead of meta shifts. The Battlefield 6 competitive landscape is constantly evolving, and the players who adapt quickest will consistently come out on top. For more in-depth guides and the latest meta analysis, check out our other Battlefield 6 content on beboivn.com.