The Mysterious Colossus Lost Chapter in Where Winds Meet stands as one of the most intriguing and challenging questlines in the game, leading players through a mysterious journey that culminates in an epic boss fight against The Void King. This comprehensive guide will walk you through every step of this enigmatic quest, from finding the colossal statue to mastering the complex puzzles and defeating the formidable final boss. Whether you’re struggling with the deer tracking mechanics or need strategies for overcoming The Void King’s devastating attacks, this guide has you covered with detailed instructions, expert tips, and battle-tested strategies.
What is the Mysterious Colossus Lost Chapter?
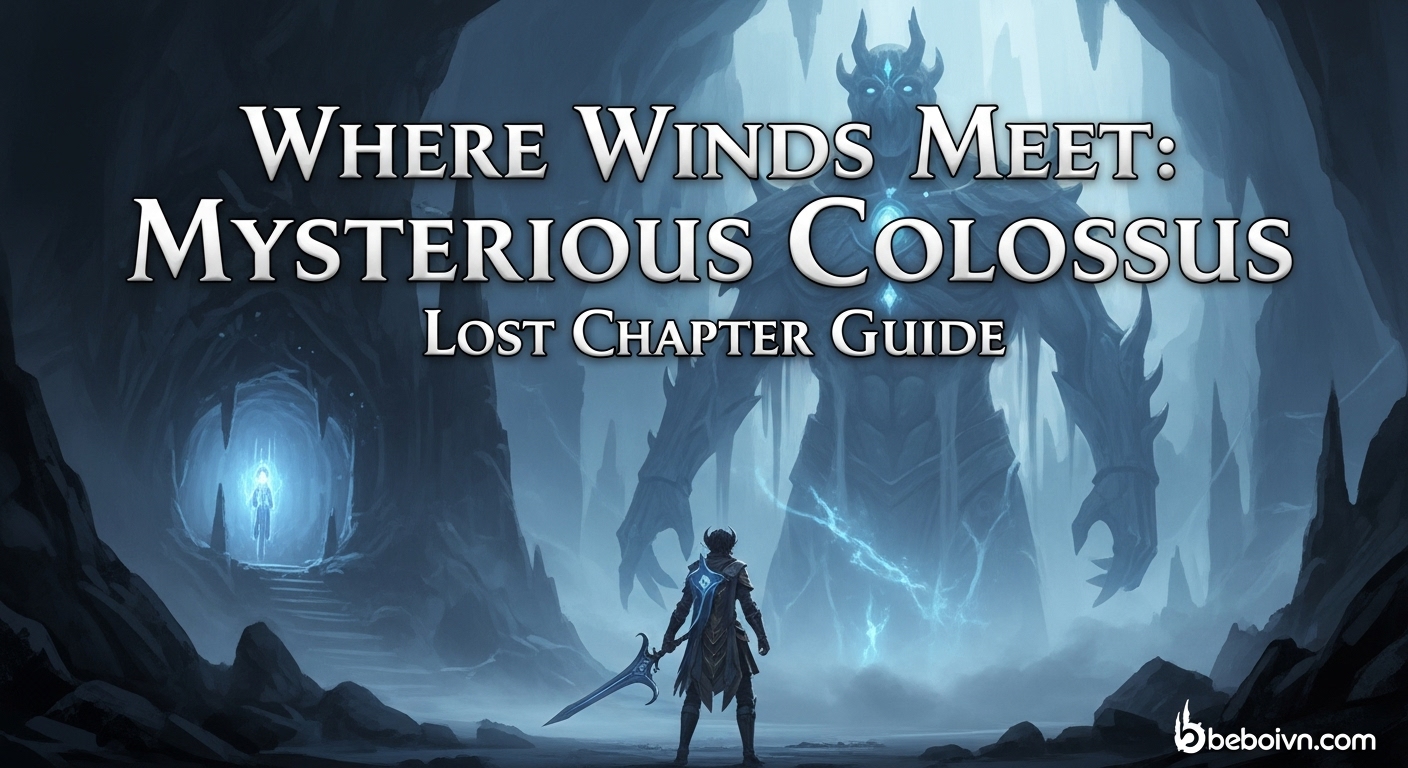
The Mysterious Colossus Lost Chapter is a special questline in Where Winds Meet that serves as a prerequisite for accessing the Gleaming Abyss campaign. This quest takes players to the Moonveil Mountain region in Qinghe, where they’ll encounter a massive Buddha-like statue shrouded in fog and mystery. Unlike many side quests, this Lost Chapter offers substantial rewards including unique items, experience, and access to one of the game’s most challenging boss encounters.
What makes this quest particularly fascinating is how it blends exploration, puzzle-solving, and combat into a cohesive experience that tests multiple aspects of your character’s abilities. From using Wind Sense to track spiritual deer to performing precise imitations of ancient statues, the Mysterious Colossus quest demands both patience and skill.
Starting the Mysterious Colossus Quest
To begin your journey with the Mysterious Colossus Lost Chapter, you’ll need to head to the Wraith Village area in Moonveil Mountain. The quest doesn’t require any specific NPC interaction to start, making it one of the more organic discoveries in the game.
Finding the Colossal Statue
- Teleport to Wraith Village: Fast travel to the Wraith Village teleport point in Qinghe’s Moonveil Mountain region.
- Head Southwest: From the village, make your way southwest toward a courtyard area where you’ll spot the massive statue in the distance.
- Navigate Through Fog: As you approach, you’ll encounter thick fog that obscures your vision. Don’t worry – this is normal and part of the quest design.
- Locate the Red-Robed Figure: You’ll see a red-robed figure and two large red coffins in the area. Ignore these for now and focus on finding the path forward.
The Initial Approach
When you first arrive at the Mysterious Colossus area, you’ll notice several key elements:
- Two large red coffins (ignore these initially)
- A red-robed figure (also not immediately relevant)
- A massive Buddha statue barely visible through the fog
- Two burning torches in the distance
The key to progressing is to head toward the burning torches. As you approach them, the heavy fog will begin to lift, revealing the full majesty of the colossal Buddha statue towering overhead.
Imitating the Ancient Statues
One of the first major puzzles in the Mysterious Colossus quest involves imitating the poses of ancient statues. This mechanic tests your attention to detail and understanding of the game’s mystic arts.
Locating the Imitation Point
- Find the Stone Men: Look for stone men kneeling in front of the large Buddha statue.
- Identify the Red Cloth: Near these stone men, you’ll see a red cloth on the ground with an “Imitate” prompt.
- Perform the Imitation: Interact with the red cloth to perform the imitation. This is crucial for progressing the quest.
Understanding the Imitation Mechanic
The imitation mechanic in Where Winds Meet is more than just a simple quick-time event. It requires:
- Proper Positioning: Stand exactly where the prompt appears
- Timing: Wait for the right moment to perform the imitation
- Mystic Energy: Ensure you have enough mystic energy reserves
When you successfully perform the imitation, a cutscene will trigger where the area darkens and a spiritual deer emerges before disappearing. This signals that you’ve completed this phase of the quest correctly.
Tracking the Deer with Wind Sense
After the imitation sequence, you’ll need to track a spiritual deer using the Wind Sense mechanic. This is one of the more unique aspects of the Mysterious Colossus quest and showcases Where Winds Meet’s innovative approach to tracking and exploration.
Activating Wind Sense
- Activate the Ability: Use your character’s Wind Sense ability (typically mapped to a specific button or key).
- Look for White Hoofprints: Once activated, you’ll see white deer hoofprints glowing on the ground.
- Follow the Trail: The hoofprints will lead you through a stone passage toward your next objective.
Tips for Effective Tracking
- Stay Focused: The hoofprints can be faint, so pay close attention to the ground.
- Move Systematically: Don’t rush – follow the prints methodically to avoid getting lost.
- Use Environmental Clues: The path often follows natural terrain features, so use the environment to guide your tracking.
The trail will eventually lead you to a stone door with two worshipers and three small statues. This is where the next phase of the quest begins.
The Meridian Touch Puzzle
Upon reaching the stone door, you’ll encounter two worshipers and three small statues. This puzzle requires the use of the Meridian Touch mystic skill and tests your understanding of the game’s spiritual mechanics.
Understanding the Setup
- Two Worshipers: These individuals are maintaining poses in front of two of the three statues.
- Three Statues: There’s a third statue in the middle that’s currently unattended.
- The Hint: If you speak with the worshipers, they’ll give you the clue to “maintain their pose.”
Solving the Puzzle
- Equip Meridian Touch: Make sure you have the Meridian Touch mystic skill equipped and ready to use.
- Immobilize the Worshipers: Use Meridian Touch on the two worshipers to freeze them in their current poses.
- Make an Offering: Approach the third (middle) statue and make an offering to pose in front of it.
- Unlock the Door: Successfully completing this sequence will unlock the stone door, allowing you to proceed.
Meridian Touch Tips
- Precision Aiming: Aim carefully at the worshipers to ensure the skill connects properly.
- Timing: Use the skill when the worshipers are in clear, stable poses.
- Energy Management: Make sure you have enough mystic energy before attempting this puzzle.
Entering the Gleaming Abyss
Once you’ve unlocked the stone door, you’ll gain access to the Gleaming Abyss, which is the next major area in this questline. The Gleaming Abyss is a dangerous cave system filled with puzzles, enemies, and ultimately, the boss fight against The Void King.
Important Cave Mechanics
Before entering, be aware of these crucial mechanics:
- Toxic Waters: Stepping into water anywhere in this cave will inflict the Toxic Waters status effect, causing rapid damage.
- Boundary Stone: There’s a boundary stone at the entrance that allows you to teleport back to the Gleaming Abyss Campaign Zone.
- One-Way Progression: Once you enter certain areas, you may not be able to go back the way you came.
Initial Cave Exploration
- Trigger the Boundary Stone: Activate the boundary stone to ensure you can return if needed.
- Follow the Path: Proceed deeper into the cave, avoiding water at all costs.
- Look for Fireflies: Interact with fireflies to advance your Glow of Fireflies mystic skills.
- Reach the Stone Coffin: Your goal is to reach and investigate the large stone coffin deep within the cave.
The Stone Coffin Puzzle
The Stone Coffin puzzle is one of the most complex challenges in the Gleaming Abyss section. You’ll need to complete three specific objectives to quell the Stone Coffin’s wrath:
- Water’s Edge
- Vine’s Depths
- Drum’s Top
Water’s Edge Objective
- Location: To the left of the path leading to the Stone Coffin.
- Objective: Interact with spirits in the area.
- Strategy: Simply approach and interact with any spirits you see to complete this objective.
Vine’s Depths Objective
- Location: Found deeper in the cave system, typically near vine-covered areas.
- Objective: Solve the vine-related puzzle or defeat vine-based enemies.
- Strategy: Look for interactive vine elements and use appropriate mystic skills to clear the path.
Drum’s Top Objective
- Location: To the right of the main path, often elevated.
- Objective: Activate or interact with drum-related elements.
- Strategy: This may involve a rhythm-based puzzle or activating drums in a specific sequence.
General Stone Coffin Tips
- Complete All Three: You must complete all three objectives to progress.
- Order Flexibility: You can typically complete these in any order.
- Environmental Awareness: Pay attention to audio and visual cues that might hint at puzzle solutions.
Navigating to The Void King
After completing the Stone Coffin objectives, you’ll progress through several more areas before facing The Void King. This section involves more exploration, puzzle-solving, and preparation for the final boss encounter.
Key Progression Steps
- Investigate the Secrets: Examine the Stone Coffin closely after quelling its wrath.
- Survey What Lies Ahead: Scout the next area to understand the challenges ahead.
- Overcome the Peril: Navigate through dangerous sections filled with enemies and traps.
- Find a Way Out: Locate the exit path that leads to the boss arena.
- Approach and Inspect: Investigate the final area before the boss fight.
- Defeat The Formless: This is another name for The Void King boss fight.
- Head to the Mist Gate: After victory, proceed to the mist gate.
- Uncover the Final Story: Complete the quest by experiencing the concluding narrative.
Preparation Tips
- Stock Up on Healing: Ensure you have plenty of wound balms and healing items.
- Equipment Check: Verify your weapons and armor are upgraded and suitable for the challenge.
- Mystic Skills Ready: Have your most useful mystic skills equipped and ready.
The Void King Boss Fight Guide
The Void King serves as the final boss of the Mysterious Colossus/Gleaming Abyss questline and represents one of the most challenging encounters in Where Winds Meet. This boss fight is divided into two distinct phases, each with unique attack patterns and strategies.
Phase 1: The Staff Master
In the first phase, The Void King primarily attacks with a sharp wooden staff, leveraging his long reach and mobility to keep pressure on you.
Key Attacks and Counters
Jumping Uppercut
- Description: The Void King performs a leaping uppercut attack.
- Counter: Dodge sideways or block if you have a shield.
- Tip: This attack often comes after a brief wind-up animation.
Spinning Uppercuts Combo
- Description: Three consecutive diagonal uppercuts in a spinning motion.
- Counter: Deflect the first attack, then watch for the staff above his head for the subsequent attacks.
- Timing: The first swing has about a one-second wind-up, making it the easiest to deflect.
Cold Claw
- Description: A rapid claw attack that can stun if it connects.
- Counter: Dodge backward or use a defensive skill.
- Warning: This attack can quickly lead to a stun-lock if not avoided.
Red Glow Attacks
- Description: When the staff glows red, expect powerful attacks.
- Counter: Parry the second swing specifically.
- Consequence: Failing to counter will result in a stun and potential quick defeat.
Golden Glow Attacks
- Description: When the weapon glows golden, The Void King jumps and fires projectiles.
- Counter: Dodge these projectiles as they cannot be parried.
- Pattern: Typically three projectile attacks in sequence.
Phase 1 Strategy
- Maintain Distance: The Void King has excellent reach, so don’t stay too close unless you’re attacking.
- Watch for Glow Cues: The color of his weapon glow tells you what type of attack is coming.
- Deflect When Possible: Successful deflections create openings for counter-attacks.
- Manage Stamina: Keep enough stamina for dodges and deflections.
- Attack Openings: Look for openings after his attack sequences, especially after the spinning uppercuts.
Phase 2: The Formless King
When The Void King’s health is reduced significantly, he transitions into Phase 2, becoming even more dangerous with new attack patterns and increased aggression.
New Phase 2 Attacks
Enhanced Mobility
- Description: The Void King moves faster and can close distance more quickly.
- Counter: Be prepared to dodge more frequently and maintain better positioning.
Area of Effect Attacks
- Description: Attacks that affect larger areas of the arena.
- Counter: Stay mobile and don’t remain in one spot for too long.
Summoned Allies
- Description: The Void King may summon minions or spirit allies.
- Counter: Deal with summons quickly or focus on the boss depending on the situation.
Charged Attacks
- Description: Longer wind-up attacks that deal massive damage.
- Counter: Recognize the wind-up animations and dodge well in advance.
Phase 2 Strategy
- Patience is Key: Phase 2 is more about survival than aggression.
- Learn New Patterns: Take time to understand his new attack patterns before committing to attacks.
- Use Environment: The arena may have elements you can use for cover or tactical advantage.
- Save Healing Items: Don’t waste healing on minor damage; save it for major attacks.
- Finisher Opportunity: When his Qi bar is depleted, perform the finisher for massive damage.
General Boss Fight Tips
Recommended Equipment
- Panacea Fan: Excellent for healing during the fight.
- Sword: Good balance of speed and damage for this encounter.
- Any Upgraded DPS Weapon: If you’ve specialized in a particular weapon type, use it if it’s well-upgraded.
Mystic Skills
- Defensive Skills: Skills that provide invincibility frames or damage reduction.
- Healing Skills: If you have mystic healing abilities, they can be lifesavers.
- Damage Buffs: Temporary damage boosts can help end the fight faster.
Combat Strategy
- Don’t Get Greedy: It’s better to land small, safe attacks than risk taking big damage.
- Watch Your Surroundings: The arena may have hazards or environmental factors.
- Learn from Mistakes: Each attempt teaches you more about his patterns.
Rewards for Completing the Quest
Defeating The Void King and completing the Mysterious Colossus/Gleaming Abyss questline provides substantial rewards that make the challenge worthwhile.
First-Time Completion Rewards
- 50 Echo Jade: Valuable currency for upgrades and purchases.
- 1 Medicinal Tales: Useful item for crafting or trading.
- 30,000 Zhou Coins: Significant amount of in-game currency.
- 1 Divine Roulette: Tome: Special item for random rewards.
- 5 Oscillating Jade: Rare crafting material.
- 30,000 Stored EXP: Substantial experience boost.
- 100 Qinge Exploration: Exploration progression currency.
- 1 Longevity Fruit Seed: Rare agricultural item.
Campaign Challenge Rewards
After completing the quest, you unlock the Campaign Challenge version of The Void King fight, which offers additional rewards:
- 2 Hawkwing Tiered Gear: High-tier equipment pieces.
- 1 Gleaming Abyss Cosmetic Chest: Cosmetic items exclusive to this quest.
- 1 Crimson Leaves Chest: Another cosmetic reward container.
- Additional Oscillating Jade: More of this rare crafting material.
- Extra Zhou Coins: Additional currency rewards.
- Character EXP: Experience points for your character.
- Repeatable Content: The ability to challenge The Void King again for farming purposes.
Frequently Asked Questions
How do I start the Mysterious Colossus quest?
The quest starts automatically when you approach the colossal statue near Wraith Village in Moonveil Mountain. No specific NPC interaction is required – simply explore the southwest area from Wraith Village to find the statue shrouded in fog.
What level should I be for this quest?
While there’s no strict level requirement, it’s recommended to be at least level 25-30 with upgraded equipment. The Void King boss fight is particularly challenging, so being well-prepared is crucial.
Can I complete this quest solo?
Yes, the Mysterious Colossus Lost Chapter and Gleaming Abyss can be completed solo. However, The Void King boss fight can be quite challenging alone, so consider bringing healing items and having good defensive skills.
What happens if I die during the Void King fight?
If you die during the boss fight, you’ll respawn at the last checkpoint or boundary stone you activated. You’ll need to make your way back to the boss arena to try again.
Are there any missable items in this quest?
Most items and collectibles in this questline can be obtained on subsequent attempts, but it’s always best to explore thoroughly on your first playthrough to ensure you don’t miss any unique rewards or story elements.
Can I replay the Void King fight?
Yes, after completing the quest for the first time, you unlock the Campaign Challenge version, which allows you to fight The Void King again for additional rewards and farming opportunities.
Expert Tips and Strategies
Preparation is Everything
Before attempting the Mysterious Colossus questline, ensure you’re properly prepared:
- Upgrade Your Equipment: Don’t enter with basic gear; invest in upgrades.
- Stock Healing Items: Carry more wound balms and healing items than you think you’ll need.
- Learn Mystic Skills: Practice with mystic skills in safer areas before attempting this quest.
Master the Mechanics
The Mysterious Colossus quest tests multiple game mechanics:
- Wind Sense: Practice tracking in safer areas before attempting the deer tracking.
- Meridian Touch: Get comfortable with this skill’s aiming and timing.
- Imitation: Understand the timing and positioning requirements for statue imitations.
Environmental Awareness
The Gleaming Abyss is filled with environmental hazards:
- Toxic Waters: Never step in water unless absolutely necessary.
- Boundary Stones: Always activate boundary stones when you find them.
- Fireflies: Interact with fireflies for mystic skill progression.
Boss Fight Psychology
The Void King fight is as much mental as it is mechanical:
- Stay Calm: Panic leads to mistakes; maintain composure even when health is low.
- Learn Patterns: Each death teaches you something new about his attack patterns.
- Patience Wins: Don’t rush attacks; wait for safe openings.
Conclusion: Mastering the Mysterious Colossus
The Where Winds Meet Mysterious Colossus Lost Chapter represents one of the game’s most rewarding and challenging questlines, offering a perfect blend of exploration, puzzle-solving, and intense combat. From the moment you first spot the colossal statue through the fog to the final, triumphant defeat of The Void King, this journey tests every aspect of your skills as a player.
What makes this quest truly special is how it integrates multiple game mechanics into a cohesive experience. You’ll use Wind Sense for tracking, Meridian Touch for puzzle-solving, imitation for spiritual connection, and combat mastery for the ultimate showdown. Each phase builds upon the last, creating a sense of progression and accomplishment that few other quests in the game can match.
The rewards, both tangible and intangible, make this questline well worth the effort. Beyond the valuable items and experience, you’ll gain the satisfaction of overcoming one of Where Winds Meet’s most significant challenges. The Campaign Challenge mode even offers replayability for those who want to test their skills further or farm for specific rewards.
As you embark on this journey, remember that patience and preparation are your greatest allies. Take the time to understand each mechanic, learn from your mistakes, and approach each challenge with a clear strategy. The Mysterious Colossus may seem daunting at first, but with this guide as your companion, you have all the tools you need to emerge victorious.
May your winds be favorable, your mystic skills true, and your blade sharp as you face the mysteries that await in the depths of the Gleaming Abyss. The Void King won’t know what hit him.